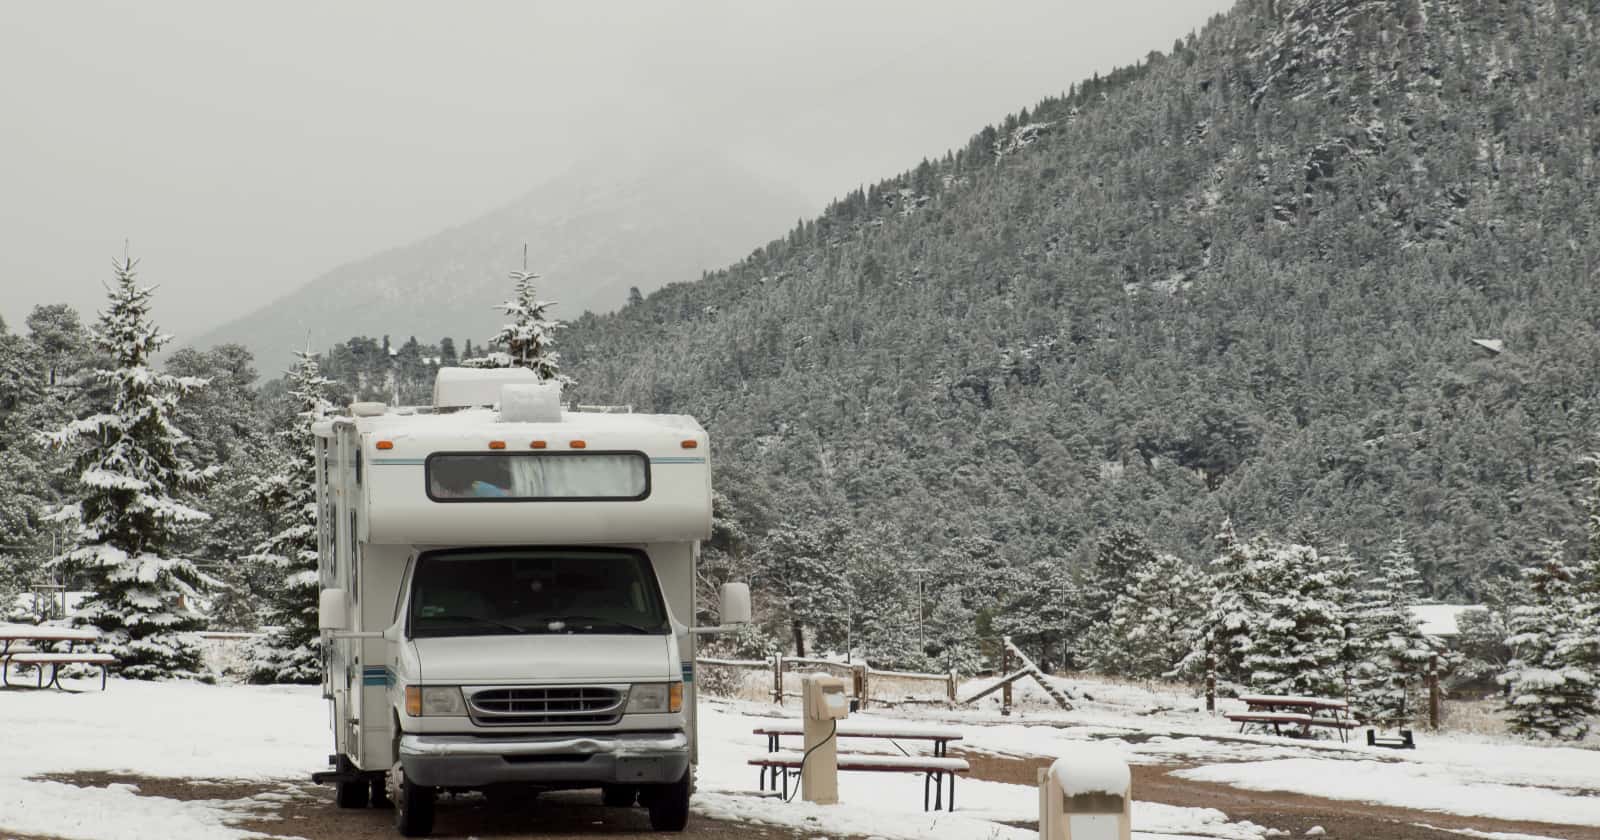
RVs are typically not the most energy-efficient shelters available. From thin windows and poor insulation to poorly sealed weather stripping, etc., it can take a lot more energy per cubic foot to keep comfortable in the winter. Full-time RVers and winter vacationers may feel this in their wallets through propane or monthly electricity bills. So whether you travel full-time in your rig or love winter RVing, here are some energy-saving products and tips that may help keep your rig comfortable and save on energy costs.
Insulation is Important
Heat is a form of energy, and cold is a lack of energy, so the hotter something is, the more energy it has inside it. The “something” in reference to your RV is the pocket of air and all the physical stuff inside your rig, including the walls. So when you heat your RV, you are basically adding energy into your rig by converting the energy stored in either propane or electricity into heat energy.
When a high-energy (hot) object comes in contact with a low energy (cold) object, the heat energy will naturally spread out until the energy (heat) has been distributed evenly between the two objects. In other words, the cozy warm air in your rig desperately wants to mix up with the frigid cold air outside until they are both at the same temperature.

Insulation is any material that slows this process to hold the heat in longer or the opposite in the case of warm weather RVing. So how do you add insulation to your RV?
RV Skirting Kits
The floor is a significant heat loss in your RV. Cold air blowing freely under your rig can carry heat away, much like a fan blowing on your skin cools you down in warm weather. Skirting is any material that prevents air from flowing under your RV. Think of it as a windbreaker jacket for the bottom of your RV.
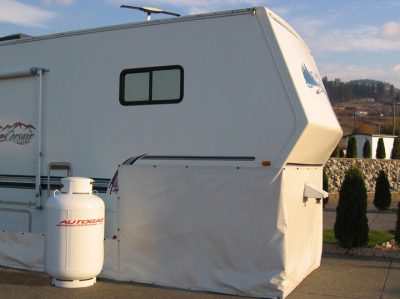
RVers have created their own RV skirting using many different materials. Most professional skirting kits like the EZ SNAP “No Drill” RV Skirting are made from heavy vinyl material. If you are looking for a more modern take on skirting, AirSkirts has a unique product.
Reflectix® For Window Insulation
The next biggest heat loss in an RV is the windows. You can usually feel the cold pressing in through them just by holding your hand near a window. Fortunately, Reflectix® is an inexpensive energy-saving product that can add some window insulation for cozier winter RVing trips.
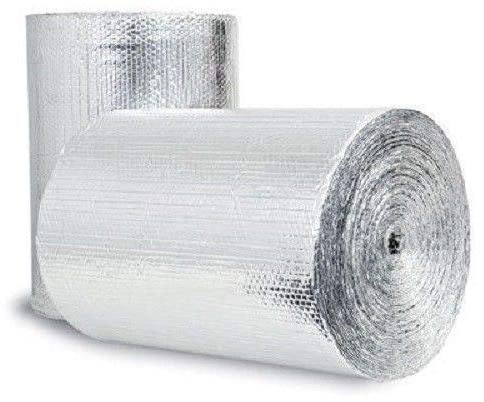
You have probably seen rolls of the stuff at home improvement stores. It’s basically bubble wrap sandwiched between a reflective foil. It can be cut to size and fit into the inside frame of windows.
As a personal note, I have spent three winters in Wichita, Kansas, and noticed that placing the Reflectix on the outside of the window is just as effective and allows for easier condensation control over the windows. If you are placing it outside, always make sure to use tape that won’t leave a residue on your RV (that means no duct tape). Instead of tape, we slid the Reflectix under the window covers used during the summer.
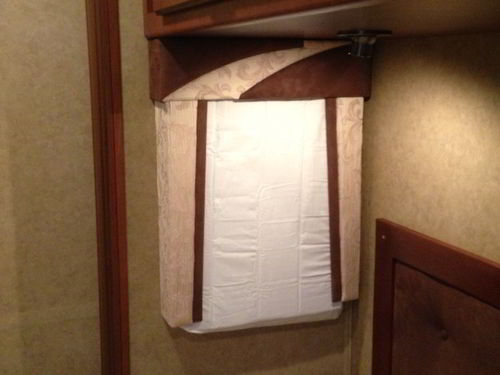
If you don’t like the look of foil covering your windows, one clever RVer used a pillowcase, roll of Reflectix, standard-sized pillow, piece of cardboard, and a few Velcro strips to make a rather polished-looking window insulators for their winter RVing trips.
Window Insulation Kit
The downside of using foil-covered bubble wrap on your windows is that it turns your window into a wall. Fortunately, Frost King makes a clear plastic window insulation kit that adds window insulation while still allowing you to see outside.
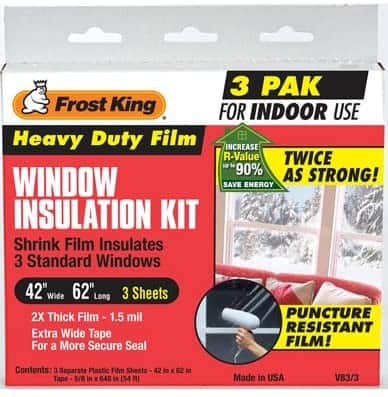
Installing the insulation is pretty straightforward.
- First, the plastic shrinkwrap is stuck to the wall or window frame using the included double-sided tape.
- Then use a blow dryer to heat shrink the plastic to remove the slack and wrinkles.
- The end result is still a clear window with double the insulation.
Roof Vent Insulators
Most RV roof vents are made out of thin plastic and provide very little insulation, whether they are open or close. RV forums will have all kinds of DIY ideas on how to insulate your RV roof vents.
Still, the easiest method by far is to use a ready-made Camco RV Vent Insulator and Skylight Cover. They fit standard RV vents. Simply push them into place and they stay there. At about $12, they are a very affordable energy-saving product for your RV. They will also help keep your rig cool in the summer.
Throw Rugs
Have you ever noticed that your RV furnace heats up your floor when it runs? Some high-end RVs even have floor heating systems. Just like a coat traps a layer of air in the insulating material to keep you warm, a thick throw rug will do the same to the heat radiating from your floor’s furnace ducts, or floor heating system.
Your RV is your space, and according to The Spruce:
…layering several rugs will create a cozy and stylish barrier that will keep toes toasty.
The Spruce
So go wild with RV rugs this winter!
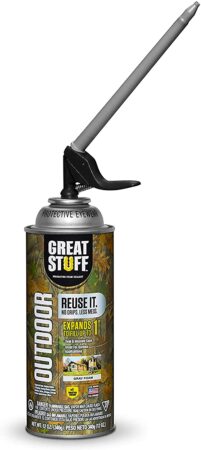
Fill Gaps With Expanding Foam
When inspecting around your RV, you may notice that there are certain places where wires come through the wall or in from the floor. You may also notice gray foam used to seal the hole.
Unfortunately, this foam tends to wear out over time, allowing heat to escape your RV. Fortunately, the spray foam used can be found on Amazon or most home improvement stores. Expandable foam comes in several colors, so be sure to get the gray or black if you don’t want neon orange foam sticking out of places.
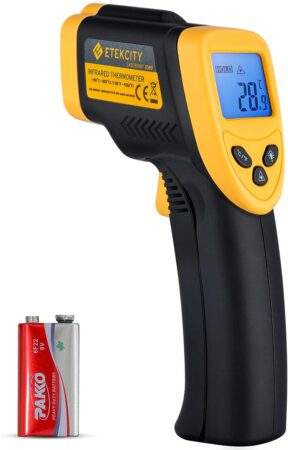
Digital Temperature Gun
You probably aren’t going to see all of the ways warm air can get out and the cold in, but you will probably feel them. Certain parts of your rig will feel colder, indicating a poorly insulated spot. A great way to hunt for these is using a temperature gun.
To find out where insulation is needed, simply point the gun around a cold spot and note where the coldest temperature in that area is located. Once you have located the problem area, you can use a blanket, Reflectix®, or a rug to add some insulation to that area and see if it takes care of the heat loss.
Heating
Insulation can provide energy savings by keeping the heat in your rig, but you still need to add the heat to your RV in the first place. Fortunately, you aren’t stuck with the only option of burning tons of propane when you decide to try winter RVing. There are several heating products on the market that will either heat your rig more efficiently or allow you to drop the thermostat while maintaining comfort.
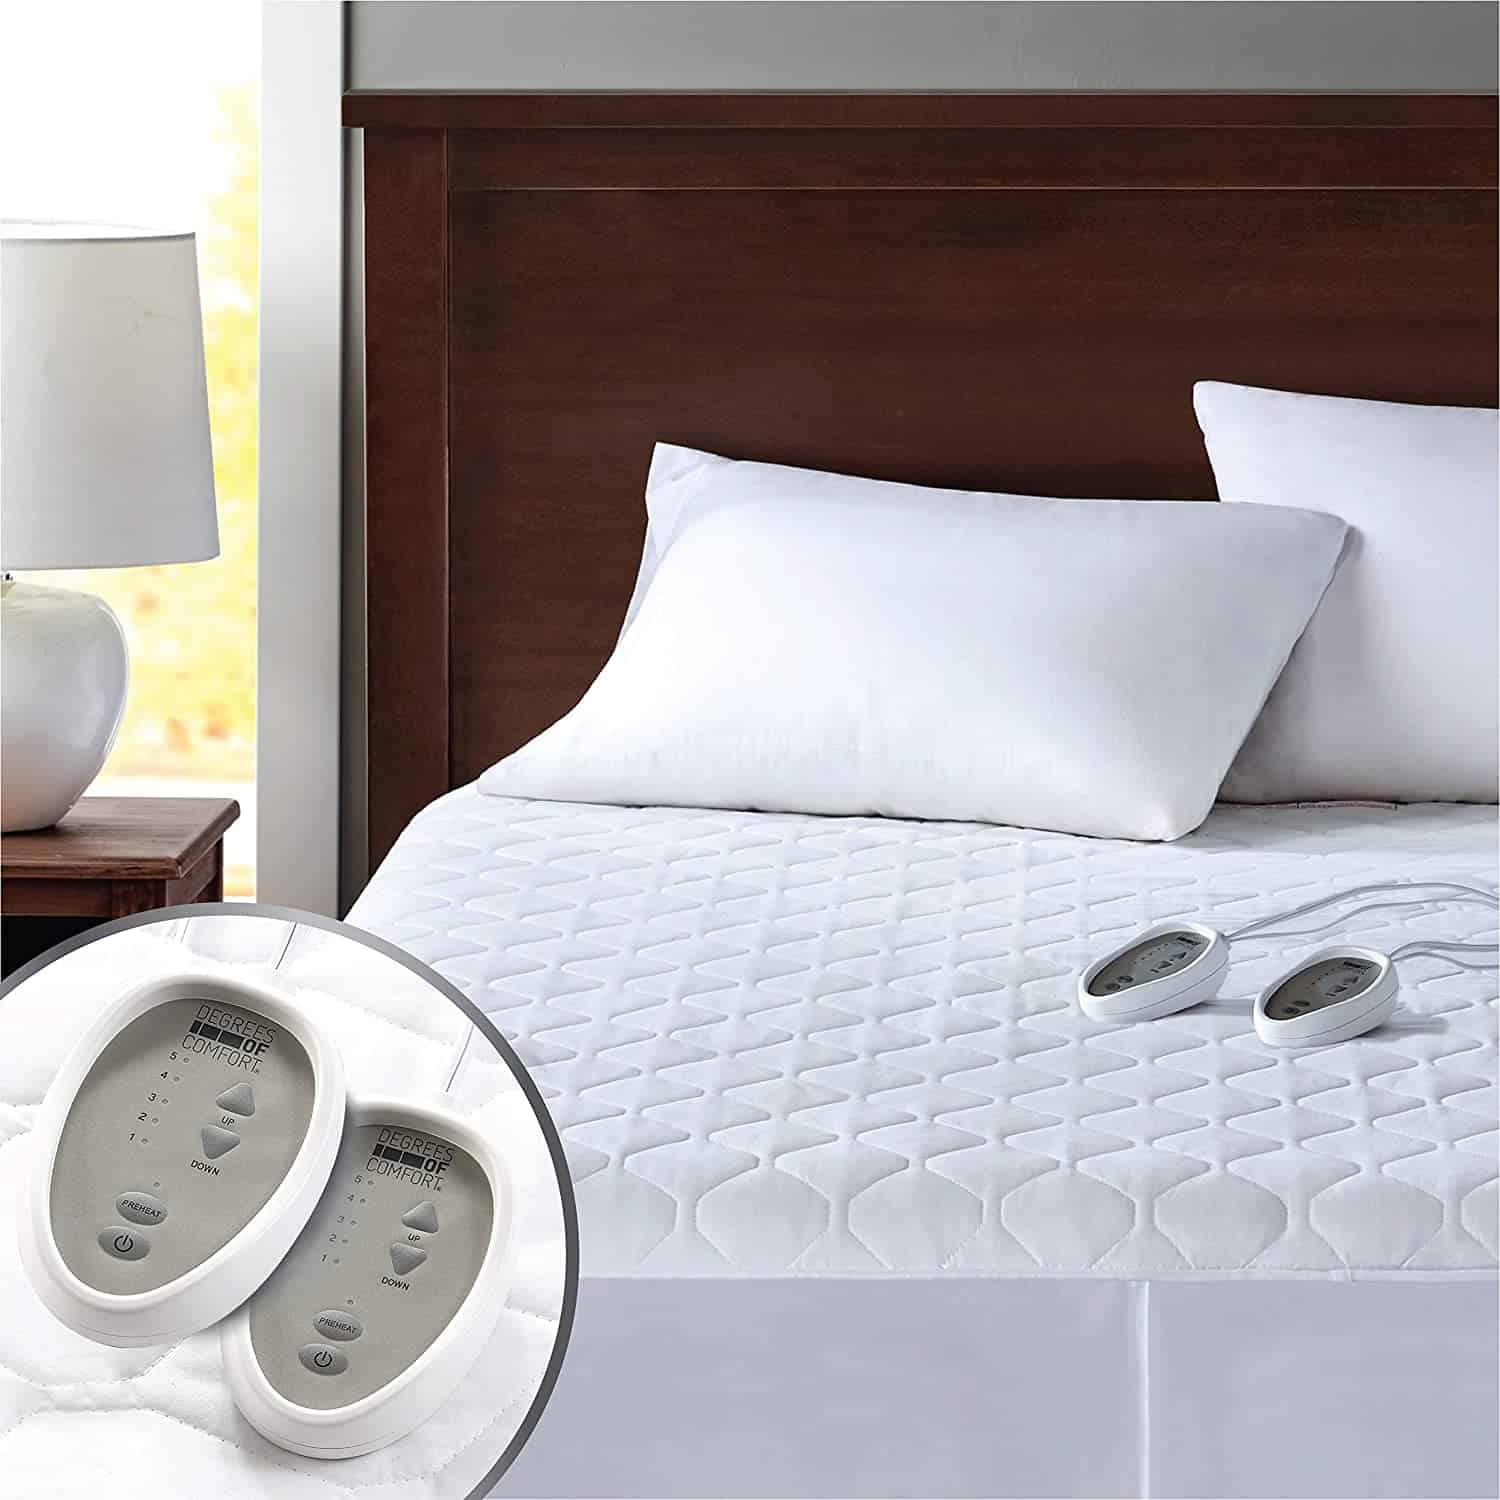
Heated Mattress Pad
The lower you can comfortably keep your thermostat, the less energy you need to pump out to keep it that temperature. During the day, many RVers will bundle up so they can turn the heat down and stay warm. Not too many people like sleeping in a winter coat though.
An electric heated mattress pad can be turned on to warm your bed up before you get in and help keep you warm in bed all night. Heated blankets and mattress pads generally have a small electrical footprint.
By placing the heat directly where you need it, you are free to keep the thermostat turned way down at night.
Oil Filled Radiator Heater
Oil-filled radiator heaters have heating elements that heat up thermal oil inside the fins. They then heat your RV via radiation. This has several advantages over other types of heaters.
- Once the oil in the heater gets hot, it takes much longer to cool down. Therefore, the heating element spends less time on compared to ceramic heaters. This means you will typically use less electricity when supplementing your heat with an oil-filled heater.
- The heating element is not exposed and is therefore considered to be a safer option than ceramic heaters.
- They are super quiet because there is no fan or moving parts to make noise.
Of course, there is no such thing as a free lunch, so these heaters come with some cons.
- They are typically larger and heavier than ceramic space heaters, so they may not be an excellent option for smaller travel trailers, small Class Cs, or Class Bs.
- Because the heat must radiate into the air and the oil must get hot before that happens, it can take over 30 minutes before you notice your space warming up.
Overall, if you are looking to supplement your propane heating with an electric space heater, the oil-filled radiator type such as the Aikoper 1500W Oil Filled Radiator Heater is an excellent option to look into.
Use a Heat Pump Instead of Propane
If you will be winter RVing in locations that stay above 40 degrees Fahrenheit, a heat pump is probably the most energy-efficient means of heating your RV.
How Does a Heat Pump Work?
Without going into too much detail about the science, there are three main parts of an AC/heat pump system:
- A refrigerant chemical that is really good at absorbing heat gets pumped through a device that looks like a car radiator called an evaporator. As the chemical absorbs heat, the refrigerant liquid turns to gas going through a compressor that heats the gas up over ambient temperature.
- The high-pressure gas is sent through another radiator-like device called the condenser. The heat picked up by the evaporator is blown out into the air. In this process, the gas turns back onto a low-pressure liquid which removes the extra heat added by the compressor.
- The now cool refrigerant liquid can absorb more heat from one location and send it to the next once again.
In short, the condenser and the evaporator have the same design allowing the process to work both ways. In the summertime, your AC takes heat from inside your RV and blows it outside. Those who have a heat pump function on their RV AC can reverse this process, take heat from the air outside, and blow it into their RV.
If you want a more thorough explanation of exactly how this process works, check out the video below.
Why is a Heat Pump More Energy Efficient?
Whether using combustion (propane) or resistive (electrical) heating methods, a traditional heater must heat your space that isn’t already there. However, a heat pump isn’t adding heat. It’s just moving it from one location to the other; the energy is already present.
If You’re a “Numbers Person”
- The average propane cost is a little over $2 per gallon; the average cost per kWh of electricity for those staying monthly typically range from around $0.10 to $0.18 per kWh
- A good RV AC heat pump unit like the COLEMAN MACH AIR CONDITIONER produces about 12,700 BTUs of heat per hour and uses 1.3kWh of electricity (when outside temps are above 40°F).
- The average RV furnace uses about 30,300 BTUs or 1/3 of a gallon of propane per hour (about 9kWh when converted).
- In the case of propane, only about 18,000 BTUs are used to heat your RV because RV propane furnaces must be vented. Therefore a significant portion of your heat energy is blown directly outside.
At $2 a gallon for propane, running your furnace for one-hour costs around $0.66, while a heat pump would cost you around $0.24 at the higher range if you are paying for electricity at your RV park.
Note: Furnace, heat pump sizes, and propane or electricity costs vary, so your RV’s actual propane/power usage may differ slightly.
That Sounds Like an Amazing Energy Saving Product! What’s the Catch?
Because it extracts heat from the outside air and moves it inside, there has to be enough warm air outside to move. For that reason, RV heat pumps start to drastically lose efficiency when outside temperatures drop below 40°F, and many won’t function adequately in temperatures below 40°F.
The best energy-saving practice is to use your heat pump when temps are above 40° and then switch to a portable heater like an oil-filled heater when temps drop below that. If you will be in freezing temps, most propane furnaces also heat your lower compartments and water pipes, so the furnace is the best heating method when winter RVing in sub-freezing temps.
Don’t Let Winter Stop You From RVing
Winter weather doesn’t have to slow you down or stop you from traveling in your RV. With these 10 smart energy-saving products, you can keep your RV toasty all winter long.
Which method do you use to keep your rig warm in the winter? Tell us in the comments.


You completely forgot about solar panels. Those can heat an RV interior by taking the electric energy and with an inverter heat small box heaters using the power of the sun. There is no need for venting since you are not burning any propane or other gas fuel.
You didn’t mention “Cheap Heat” https://www.rvcomfortsystems.com/
We installed the system into our fifth wheel in 2018 and it has worked like a champ keeping us warm in below 0 temperatures. It paid for itself after the first winter in propane cost savings.
I have tarp skirting and also line it with insulation panels. I put the clear plastic on inside and outside of my windows. I am in northern Minnesota and it’s been 30 below and I stayed warm. I set my heat on 60 and 50 at night. Go through a30 pound propane tank about every 6 to 7 days
This made me laugh. First, I boondock so not running electric heaters or heat pumps. Second, it’s the giant size of rigs people think are necessary that are costly to heat or cool. Just as a large house compared to a small house. I live full time in a 20′ Class B, no slides. I don’t worry about the virtually nil insulation when cold as my space is so small I generally get three weeks on 7 gallons of propane in the high desert of AZ. And all summer on 7 gallons. This is way cheaper than utilities in a house. My solar provides all the electricity I need except if I want to microwave something. Then I run the generator for 10 minutes.
But the biggest advantage for me in going small is I can go back on roads these big rigs can’t. Traveling only on highways from one RV park to another and you are missing so many of the best places. Not just in America, but Canada and South of the border.
A very simple way to describe a heat pump to someone is ask them to think about the times they’ve stood OUTSIDE, in front of a window air conditioner. There’s warm air exhausting from it (yes, some of the heat is generated by the inefficiency of the unit). A heat pump is analogous to simply turning the window A/C unit around so you’re air conditioning the outside and blowing the removed heat to the inside.
Solar and heated floors are so a good way to go. Expensive to put in but energy savings pays off.
Heated floors in an RV would be divine!
Using electricity to heat when off grid? Nope.
Using an unvented propane heater inside my small 22 foot travel trailer? Nope
The other ideas are practical.
We bought foam board from Dollar Tree, lined it with Reflectix, and cut it to fit all our windows and windscreen. Not only does it make a huge difference in winter, it also helps keep us cool in summer, allowing us to run less AC. In a single pane ’93 Class A, this was a big deal. We also made panels of this for spots where cold seepage was a problem that were too big for spray foam. We used them for under our kitchen counter (not the cooking side, we have a 5’lomg open base counter top opposite the cooking side, under a window, that gets pretty cold– well, not any more!! The side walls of the bedroom under the windows, and the inside of the large cedar lined closet also.
We use the cab for stowage when we are parked, and that dead air space can get chilly, even with our window covers. We have heavy curtains on ALL windos which also insulate, and we added a full floor to ceiling curtwin (IKEA) on a tension rod at ceiling height, which hides the cab are aand holds in more heat or cold.
With these mods we are able to use two small ceramic heaters, one in the bedroom & 1 in the living room, to keep us warm and not run the furnace much. This even keeps our birds warm, we just cover the side of the cage away from the heater and monitor the temps. We also made a long curtain to go over the door, which also has the foam & reflectix treatment on the window.
You can also use this to fill in your over head domes & vents, use magnets to secure. We found magnet tape did NOT work, so get some small super strong ones and attach.
The most efficient method of heating in a motorhome / caravan is undoubtedly a double floor with a heat source in the double floor. This applies to both Hot Air / Electric / Liquid-borne heat.
With underfloor heating you get an even heat that rises throughout the room, also up along the walls. Without underfloor heating, the temperature difference between floor and ceiling will be large.
Sincerely, A.J Norway
I don’t see where the “hybrid” furnace is going to save you money IF you are paying for your electricity at a campground. In most cases the electric cost is actually higher than propane cost and the electric pricing is normally raised higher for the camper than the actual cost that the campground pays overall for their electricity. We run our furnace on propane and a 30# bottle normally will last us a week or possibly a little longer and we are in mid-teens to upper 20 temps at night and sometimes but not all the time the daytime temps do not reach above 45 so a heat pump is useless. I’ll stick with my propane furnace and set the temp down some at night and throw an extra blanket on the bed for a little extra warmth if needed. I have insulated the floor by putting 2″ foam between the flooring supports in our fiver and it has helped tremendously. Good luck and happy camping no matter what the temps are!
Wintering in the northern states can be a challenge but I’ve learned a couple of tricks that help keep the cold out and heat in. Slide outs leak air so I use pipe noodles and frame my slides with them using double sided tape for the sides and they just lay in the top of the slide. For the bottom, I use 1″ square foam air conditioner strips or split the pipe noodles in half and slide them in the gap. In smaller slides, door draft stoppers can be laid across the top. Since I don’t have a washer/dryer in the unit but outlets for them and dedicated circuit breakers, I use that circuit for my bedroom space heater (you have to know your units wiring before doing that) but it splits your extra heater off the main aux outlets so you’re not tripping breakers because of overloading. For the floor, I went to a carpet store and asked if they had any remnants or discontinued samples ( perfect size for a tile carpet floor in the bedroom – gives an artsy look with the different colors and textures. Everything can be stored under the couch or in the basement without taking up too much room and doesn’t take too long to install or tear down and can be reused the next winter.
The average cost of propane is now $3.00 a gallon. Just had mine filled this week. Keep up the good work.
Reflectix is great for larger areas, but for my windows and windshield I use the decorative bubble sun-shades that fold up easily, and they fit nicely under the pull down shades. Four layers of carpet on the floor !