Fortunately, RV Hot Water Maintenance Is Relatively Straightforward
I don’t know about you, but I ADORE the ability to take a hot shower no matter where I end up parking my RV. Of course, for this to be possible, I have to have a working RV water heater, meaning I have to keep it in tip-top shape. Below, I’ve included everything you need to know to keep your water heater working for many miles and hot showers.
Avoid Turning On when Empty
First and foremost, you need to know when NOT to turn your water heater on. Your RV water heater absolutely cannot be turned on when the water heater tank is empty.
You can tell if the tank is full by running the hot side of a faucet. If the water comes out without spitting, the tank is full. If it’s spitting, the tank has yet to fill up, or there is air in the water lines. Let it run out of the faucet until a steady stream of water comes out.

Unfortunately, it is easy to forget the tank is empty and flip the switch to turn the heater on. This could lead to a damaged tank, and in the case of electric water heaters, it could mean a damaged heating element.
Our advice? Put a piece of painter’s tape over the water heater switch any time you empty the tank so you don’t make this costly mistake.
Drain Water when Not in Use
If you use your RV every weekend during the summer season, you probably don’t need to drain the water heater between trips. That said, those who leave their RVs sitting for months should be draining it when not in use.
Water that sits for more than two weeks or so can become stale, stinky, and unfit for consumption—not qualities you want the water in your RV plumbing system to have.
Install Water Heater Bypass Valve
Like the rest of your RV, your RV water heater does require some preparation for the winter season. To make these preparations, you will need a water heater bypass valve.
While some RVs already come equipped with such a valve, others do not. Check to see if your water heater has a bypass valve, and if not, be sure to install one before the cold weather comes around.
Empty and Clean Before Winter
Wondering what you must do to your water heater to prepare it for the cold season? Luckily, there isn’t a whole lot to the winterization of this appliance. All you have to do is turn off the heater, let the water cool, empty the tank entirely by removing the plug (a socket wrench is helpful), wash the heater using an RV water heater rinser, and rinse the cleaner and any debris from the tank with the city water supply.
Once this is done, you can switch the bypass valve to bypass mode and continue winterizing the rest of the RV.
Clean Tank Before First Trip
Before the first trip of the spring, be sure to rewash the tank. The aforementioned RV water heater rinser product can be used again, and everything can be rinsed out with the pressure from the water hose. If you wait weeks between trips, you might want to repeat this process before every RV adventure.
Clean Burner Tube in Spring
Another thing you’ll want to do before the first trip in the spring? If your RV water heater has a gas mode (and most do), you’ll need to clean the burner tube. This is the tube that carries propane to the burner.
Often, spiders like to make themselves at home in this burner tube. Additionally, it can become clogged with debris. Both of these things result in less fuel being delivered to the water heater, which can cause the heater to stop working entirely.
To clean your burner tube, use compressed air to blow out debris. If a clog is particularly stubborn, you might try using pipe cleaners to get rid of it.
Replace Anode Rod as Needed
RV water heaters made by Suburban are made of porcelain-lined steel. Because of this, these water heaters all come with anode rods to protect the lining.
How It Works
Corrosion is an electrochemical process that happens when ions in a metal flow from one distinct area to another when exposed to an electrolyte medium that allows ions to flow. A part of the metal gives off electrons into the electrolyte solution, which is water with dissolved salts and minerals in it in the case of a water heater. As the metal continues to undergo this process, it corrodes. The part of the metal that is giving off negative electrons (corroding) is called the anode, and the part that receives them is called the cathode.
To prevent this reaction from happening to one metal (your tank), we can introduce a more reactive metal into the situation. When a more reactive metal than iron is present, that metal will give its negative electrons into the water first. This prevents the metal you are protecting from corrosion. In other words, the more reactive metal becomes the anode and corrodes or is sacrificed in place of the metal you are protecting.
Aluminum vs. Magnesium
Because the anode rod’s job is to corrode in place of the tank, it will eventually disintegrate to the point that it needs to be replaced. When it comes time to replace your anode rod, aluminum and magnesium are the two main choices.
Magnesium is the most reactive of the two and is considered the best protection for your tank in most cases. However, if you are in locations with very hard water, a magnesium rod could be too reactive, resulting in having to change it quite often (within a year or so). It’s for that reason that aluminum rods are preferred in locations with hard water. However, if you plan on using an RV water softener, you will want to use a magnesium rod.
As a note, aluminum anode rods can help when sulfer-rich water is present. Water that is high in sulfur smells like rotten eggs. An aluminum rod reacts with the sulfur and can help remove the smell.
If your water heater is the type that has an anode rod, it will be part of your drain plug. So it’s pretty easy to look at it when you drain the tank. You should replace your anode rod when it has been about 60-75% consumed. Generally, this happens every 3 to 5 years, but we recommend checking the rod every time you winterize to ensure it’s still in good shape.
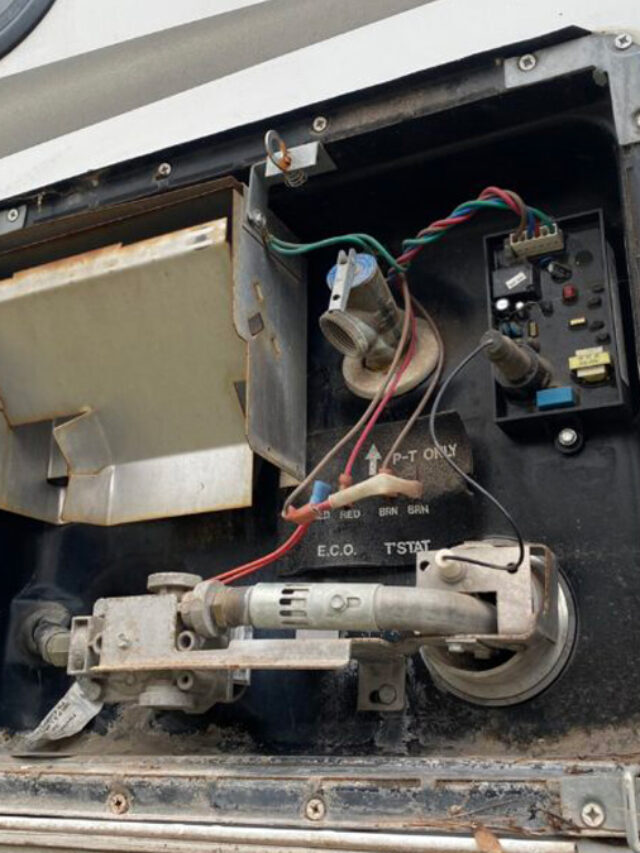
Inspect Before Each Trip
Last but not least, you will want to visually inspect your water heater during your walkaround before every trip. Look for debris in the burner and the vent slots. You’ll also want to keep an eye out for leaks and any black marks caused by an improper air and fuel mixture when running a gas water heater.
Hopefully, these tips will help you take excellent care of your RV water heater. By ensuring you maintain this appliance properly, you should be able to enjoy hot water in your home-on-wheels for years to come, meaning hot showers in the middle of the desert, the middle of a parking lot, or anywhere else you may land.