Without a doubt, one of the greatest conveniences an RV provides is its supply of water. It eliminates the need for pit stops and ensures that nobody on board will get dehydrated while traveling. And after a long day on the highway there’s nothing more relaxing than a hot shower – except maybe a hot shower in the privacy and comfort of your RV!
All of this is made possible by your RV’s fresh, gray and black water tanks. This mobilized water supply is a marvel of modern engineering; just a few decades ago, one could only dream of having a complete set of plumbing fixtures in their vehicle! However, many new motorhome owners balk when they learn that, unlike typical residential water and wastewater systems, RV water systems require regular emptying and sanitizing.
If you’re used to a municipal or well water supply, maintaining your RV water tanks can sound like a lot of work. But trust us, it’s not so bad once you understand the process! We’re about to go over everything you need to know about your RV water system, including step-by-step instructions for sanitizing each of your water tanks – read on and let’s get started!

Water on Wheels: How Your RV Water System Works
#1 – Tanks a Lot
Your RV water system is comprised of several types of tanks: fresh water, gray water, black water and hot water.
Fresh water tanks hold clean water and supply it to all the sinks, showers and toilets throughout your RV. Cold water comes straight from the fresh water tank; if you have hot water taps, as most RVs do, the water first travels from the fresh water tank to the water heater before coming out of the faucet. Some RVs have separate hot water tanks while others have tankless on-demand water heaters.
Water from sinks and showers is considered gray water. It’s dirty and not really usable for anything without lots of filtration, but it’s not considered toxic. Once it goes down the drain it’s stored in the aptly-named gray water tank.
Toilet water is another story. Unlike gray water, it’s considered a biohazard as it contains human waste and tons of potentially dangerous bacteria. To prevent contamination and potential illness, it’s stored separately in the black water tank.
#2 – Scheduled Maintenance
Each of your water tanks requires regular maintenance. A dark container full of water is an ideal breeding ground for all sorts of unpleasant organisms: bacteria, mold and insects thrive in the conditions your water tanks provide. For this reason, routinely cleaning and sanitizing your water tanks is one of the most important RV upkeep tasks.
The black and gray water tanks are the most obvious sanitation hazards, so they need frequent emptying and cleaning. Don’t worry, you won’t have to get up close and personal to find out if they’re due for draining! They have sensors inside that detect how full they are and display this information on a monitor in your RV.
Black and gray water tanks share the same drain valve and should be emptied at the same time if possible. You can empty the gray water tank on its own if it’s full, but it’s best to drain it immediately after the black water tank in order to flush any leftover grime from the valve. If you drain your black water tank and don’t have any gray water to drain afterwards, you’ll need to use fresh water to clean the valve.
The best time to drain the waste water tanks is when the black water tank is between ½ and ⅔ full. A full black water tank is very heavy and susceptible to cracking or leaking, especially when the RV is moving. But you don’t want to drain it when it’s less than half full, either.
Without enough liquid and time to break down the solid waste inside, a black water tank can become clogged. Not only do clogs stop the tank sensors from functioning properly, they’re incredibly gross and require extra elbow grease to remove. Save yourself the trouble and empty your tanks at the appropriate times!
In addition to regular emptying, you’ll need to deep clean and sanitize your black water tank often, ideally once a week. The gray water tank can be sanitized monthly. However frequently you do it, sanitation should occur immediately after dumping for best results.
Fresh water tanks don’t require such frequent cleanings. You should only need to sanitize your fresh water tank once a season, after the tank has gone unused for several months or whenever you notice an odor coming from the water. The fresh water tank sanitizing process simultaneously disinfects your hot water tank, so you don’t need to worry about cleaning it separately.
Even though you don’t need to sanitize your fresh water tank that often, it’s still important to do so routinely, especially if the tank has been empty or stagnant for long periods of time. The residual moisture in the tank combined with the dark, sealed environment is a recipe for mold and bacteria growth. Contaminated water not only smells and tastes bad, it can cause serious illness, especially in children and the elderly, so take the time to keep that tank clean!
Sanitation Made Simple: The Ultimate RV Water Tank Cleaning Guide
It’s a potentially dirty job, but someone’s got to do it. You could pay professional hundreds of dollars to sanitize your RV water tanks… or you could put on some gloves and get it done yourself with some basic household chemicals and a few hours of work. If you want to take the DIY route, read on – we’ll walk you through the process from start to finish.
#1 – Sanitizing the Fresh Water Tank and Hot Water Tank
Let’s start with the fresh water tank. It supplies water to all the other tanks in your RV, so we might as well get it as clean as can be right off the bat! Your hot water tank, if you have one, will be sanitized in the process as well.
Before you get started, park your RV on a level surface with good drainage. You’ll need an old measuring cup, a funnel, an old gallon jug, unscented liquid chlorine bleach, new water filters to fit your specific system, and a supply of potable water.
This task will take six to 24 hours, but don’t worry: most of that time will be spent waiting. You’ll only be actively involved in the process for an hour or two.

- Includes one EVO replaceable spun polypropylene water filter...
- 5 micron barrier and granulated active carbon reduces bad taste,...
- KDF material reduces bacteria in water
- CSA low lead content certified and complies with California's...
- Filter lasts one camping season
#2 – Draining the System
Turn off all taps and faucets in your RV, shut off the water pump and remove any water filters. Make sure that the water heater is completely turned off and cooled down, then remove the drain plug (on the bottom of the heater) and release the pressure valve (on the top of the heater) to empty it.
Locate the drain valves for the hot and cold water lines. There will be one for each line positioned at the lowest point in the system. Open these valves to drain the water from the lines.
Finally, open the drain on the bottom of the fresh water tank. The system should now be almost entirely empty. You can get the remaining water out by turning the water pump on for a minute and letting it push the last of the water out; turn the pump back off once the flow stops.
Once the system is fully drained, close all the drain valves and the water heater’s pressure relief valve.
#3 – Sanitizing the System
Now it’s time to mix your sanitizing solution. Put the funnel into the mouth of your gallon jug and fill it with ¼ cup of chlorine bleach for every 15 gallons of your fresh water tank capacity – ½ cup for 30 gallons, 1 cup for 60 gallons, and so on. Fill the remainder of the gallon jug with fresh water.
Pour your bleach-water mixture into the fresh water tank, then add water to the tank until it’s almost full. Close the fill valve and turn the water pump back on; don’t turn the water heater back on until the sanitation process is completely finished.
Turn on each tap one at a time and allow water to flow from the faucet until you smell the bleach. Since the hot and cold water lines are separate from each other, you’ll need to repeat this process twice at fixtures with separate hot and cold knobs. Once you smell bleach from each tap, you’ll know that the entire system now contains the sanitizing solution.
Shut the water pump off again, make sure that all taps are closed and top off the fresh water tank with more potable water. If you can, take your RV out for a spin on some hilly or winding roads so the bleach-water solution sloshes around in the system, contacting as much of the surface as possible. Then let everything sit for at least six hours, ideally overnight.
#4 – Refilling the Tank
After the sanitizing solution has had some time to do its job, it’s time to drain the system again. Follow the same steps as you did when you drained it the first time: turn off all power, release the heater’s pressure valve, open all the drains and run the pump for a minute to force out any remaining water. Then close everything up again and fill the fresh water tank with clean water.
Once the tank is refilled, turn the water pump on and open all the faucets in the RV. You don’t have to do them one at a time this time around – it’s fine to turn all of them, both hot and cold, on at once. Run them until you stop smelling bleach; this should take just a few minutes.
If you still smell bleach after this initial flush then you may need to drain and refill the system again. Should the smell persist after two flushes, you can drain the system once more, mix ½ cup of baking soda with a gallon of water, add the mixture to the fresh water tank and fill the remainder with clean water. Let it sit for a few hours, then flush and refill the system one more time; the baking soda should eliminate any remaining chlorine odor.
When you’re satisfied with your newly sanitized fresh water tank, you can install your new water filters and restore power to the water heater. Your RV’s water will now be safe to drink and free of any weird tastes or smells for months to come – a big reward for a fairly simple task!
#5 – Sanitizing the Gray and Black Water Tanks
Your RV’s gray and black water tanks need to be sanitized more frequently than your fresh water tank. Thankfully, this process takes less time and uses less water than fresh water tank sanitizing. You can do it in a few minutes at your preferred RV dump station.
You’ll need a clear sewer hose, an old measuring cup, a funnel, an old gallon jug, unscented liquid chlorine bleach, a garden hose and an enzyme treatment formulated for RV holding tanks. If your black water tank has a flush valve, you won’t need any additional equipment. If it doesn’t, you’ll need a special garden hose extension called a holding tank rinser.
#6 – Emptying the Black Water Tank
Prior to sanitizing the black water tank, you’ll need to empty it just as you normally do. Hook your clear sewer hose up to the tank’s drain valve and insert the other end into the dumping station outlet. Open the valve and empty the contents of the tank.
When the tank is emptied, close the drain valve, fill the tank with water and drain it again. Repeat this process until the water coming out of the drain hose is clear. Close the valve but leave the drain hose attached; you’ll be using it again in the next step.
#7 – Sanitizing the Black Water Tank
Before starting this step, close your toilet lids to block any fumes produced in the black water tank. Using your funnel and measuring cup, pour one cup of bleach for every 15 gallons of black water tank capacity into the gallon jug, then fill the rest of the jug with water. Pour the contents of the jug into the black water tank, then add water to the tank until it’s ¾ full.
Let the mixture work for 5-10 minutes; don’t exceed 10 minutes or the bleach could damage your pipes. Drain the tank and immediately refill it with clean water. Continue draining and refilling until you no longer smell the bleach and the water runs clear.
#8 – Pressure Washing the Black Water Tank
After you’ve flushed all the bleach from your black water tank, it’s time to remove all the gunk it loosened up inside. If your RV has a black water flush valve, just hook your garden hose up to it and follow the manufacturer’s instructions for washing the tank. Keep washing until you no longer see any debris through the clear sewer hose.
If your system lacks this feature, hook your garden hose up to a water source and attach your holding tank rinser extension to the other end of the hose. Turn off your water pump and open the flush valve on the toilet above the black water tank. Insert the rinser wand through the toilet and down into the black water tank, then turn the water on.
The wand will spray water in many directions; move it around to ensure maximum coverage. Have a helper monitor the sewer hose and give you a shout when the water drains clear. Once debris stops flowing, you can remove the wand.
#9 – Emptying the Gray Water Tank
Now that you’re all done sanitizing your black water tank, you can empty and sanitize your gray water tank. Shut off the black water tank drain valve and open the gray water tank drain valve. Once it drains, fill it with water and drain it again, repeating the process until the water runs clear.
#10 – Sanitizing the Gray Water Tank
Close the gray water tank drain valve and disconnect the sewer hose. Mix another batch of sanitizing solution in your gallon jug, again using one cup of bleach per 15 gallons of tank capacity and filling the rest of the jug with water. Pour the mixture into the gray water tank and add more water until it’s ¾ full.
Seal up the tank and go for a drive – 10 minutes should do the trick – so the sanitizing solution sloshes and coats the inside of the tank. Hook it back up to the sewer outlet and drain the tank, adding and draining water until you see it run clear through the drain hose.
#11 – Adding Enzyme Treatments and Water
This final step is optional but will make future tank cleanings much easier and quicker. Following the instructions given by the manufacturer, add a biodegradable enzyme treatment to your black water and/or gray water tanks. These widely-available products help to break down grease and solid waste, preventing them from hardening and sticking to the walls of your holding tanks.
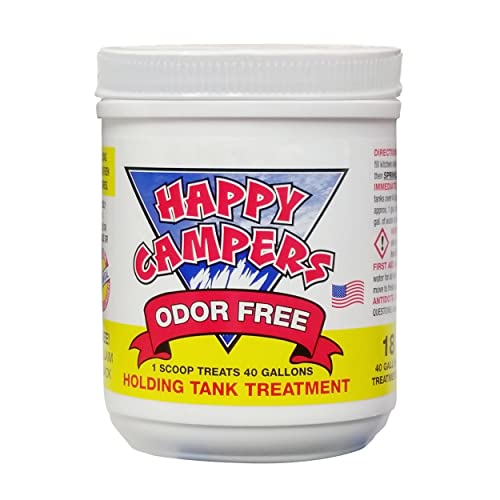
- Powerful Odor Control: Say goodbye to unpleasant odors with our...
- Effective Waste Digestion: Happy Campers breaks down waste and...
- Long-Lasting Performance: Our concentrated formula means a little...
- Safe for All Tanks: Compatible with all septic systems and...
- Easy to Use: Simply add the measured amount of Happy Campers to...
Most of these products are intended for use in black water tanks, though some can be added to gray water tanks as well. Regardless of whether or not you use these treatments, it’s usually recommended to fill your tanks with a gallon or so of water after emptying them to help with the degradation process.
Close up your tanks, clean up your materials and breathe a sigh of relief. You’re done sanitizing your black and gray water tanks! Now that all the sludge and smells are gone you can bid the dumping station goodbye… until next week, of course!
Product data was last updated on 2024-04-26 at 06:50.