Owning an RV means there may come a time when you need to put your camper into storage for a few weeks or an entire season. No matter how long or short of time you store your camper, you’ll need to prepare your RV beforehand to prevent damage. So what’s the best way to prep your camper for long-term or winter storage, what should you look for when selecting a storage facility for your RV, and what will it cost?
In this guide, I answer these questions, so you know how to winterize your RV including winterization techniques and storage requirements.
Why You Need to Prep Your RV for Winter Storage
Storing your RV means weeks, if not months, of time passing while the elements take their toll on your unit. Harsh weather can beat up your paint job, awning, and tires, and insects and rodents are just waiting to take up residence inside your cozy camper.

There are specific steps to winterize your RV when storing it during freezing winter months. But, whenever you park your RV for any length of time, even in places that have a pleasant climate year-round, there are additional steps you need to follow.
When you fail to properly prepare your RV for storage, you take the risk of returning to your camper to find:
- Flat tires
- Dead batteries
- Burst water lines
- Torn awnings
- Mice nests
- Bad fuel
- Mold and mildew
If you store your RV on or nearby your property, you can perform routine checks on it to assure things look good.
For those who must park their RV off their property, you have to trust in the steps you took to prepare your RV for storage and the facility you pay to keep it safe until you return.
Follow the 9 tips below to prevent damage to your RV while it sits in storage, then continue to the next section where I give you the five things you need to look for in a suitable storage facility and what that service should cost.
Top 9 Tips for Winterization
Leaving your motorhome, camping trailer, pop-up, or other recreational vehicles in a parking facility can leave you feeling nervous. Not having the ability to check on your RV means it’s imperative you do all you can to prepare your camper properly.
While you can’t foresee all the things that could go wrong while your RV is in storage, you can minimize the risk of significant damage by following these tips below.
#1 – Drain Tanks and Water Lines
To prevent burst pipes during freezes, you need to remove all the water from your RV plumbing system and possibly add antifreeze. Even when you store your camper in a mild climate, leaving water in your pipes can lead to damage if a fitting starts to drip.
There are many debates on what is safer, just blowing out the water from the lines, or adding antifreeze to the water lines while your RV is in storage. Which method you follow depends on what type of climate your RV will experience while in storage. If there’s no fear of a freeze, blowing out the lines is fine.
Knowing how to clear your water lines is a valuable lesson every RV owner should know for not only times when you store your camper, but if you need to fix a water leak while you’re on the road.
Steps to Drain RV Water Lines
Turn off and unhook from your water supply, then open your faucets and drain the water from the main plumbing lines. Flush your toilet until the water stops flowing. You’ll be adding liquid back into your toilet to protect the rubber flange at a later point.
Drain the fresh water tank, and flush out and sanitize the black and gray holding tanks thoroughly. If your camper doesn’t have a built-in holding tank sprayer, you can purchase a long sprayer wand that makes cleaning the inside of your holding tanks a breeze.
For storage in regions where there’s potential for freezing temperatures, you’ll wait to drain the water heater until after you’ve added antifreeze. If you’re not filling your water heater with antifreeze, bypass the water heater, then open the drain plug to your water heater and empty the tank.
Blow any residual water out of the plumbing line with an air compressor, but make sure your faucets are open during this stage or the pressure can damage your lines and fittings.
To be positive that none of your pipes will freeze, use antifreeze to run through all of your RV water lines, including the toilet. Make sure you only use a non-toxic antifreeze which is safe for drinking water systems and specifically made for RVs.
Close your faucets and cover your drains then add antifreeze by using any of the RV winterizing kits you can purchase online. Pump in the antifreeze into your water lines via your pump until the lines are pressurized.
One at a time, open all the hot and cold faucets in your RV until antifreeze runs out, then close them. Flush your toilet until you get about a quart of antifreeze in the bowl.
Turn off the water pump and open a faucet to release the pressure. Flush your toilet to drop antifreeze into your black holding tank. Make sure you add at least a quart of antifreeze into your gray water holding via sink and shower drains.
Pour several inches of antifreeze into your toilet, then cover the bowl with plastic wrap to prevent evaporation. If you’re not using antifreeze into your water lines, fill your toilet bowl halfway with water before you put on the plastic wrap.
If your RV has other components like a water filtration system or washing machine, consult the owner’s manual for winterization directions, so you prevent damage to those units.
#2 – Clean Your RV
The first step to prep for storing your RV is to clean the inside and outside deeply. Removing built-up dirt and grime from your camper will allow any caulking repairs you may need to adhere properly.
Clean and vacuum the inside making sure you get into all the cabinets and crevices. Remove everything from the refrigerator and clean it thoroughly. Deep clean the inside of your oven and any nooks where food crumbs may have fallen.
Use a vinegar and water solution for cleaning. The smell may seem intense, but vinegar is an affordable cleaning option that is fantastic to remove mold and mildew and keep it from growing while your camper sits empty.
Wipe down every surface inside your RV, including the ceilings and walls. Once you park your RV at the storage facility, open all cabinet doors and drawers to improve air circulation.
Clean all spills from inside your refrigerator, then prop open the doors, Place open boxes of baking soda inside each section.
Remove all food and clothing items, even cotton balls, from inside your RV to discourage any mice who find their way inside from building a nest. You in no way want to encourage critters to settle in.
For items you want to keep inside your camper that could attract bugs or rodents, store them inside plastic bins with a tight cover.
Take the opportunity during the internal cleaning process to remove items you didn’t use at all during your last camping trips and donate them.
Inspect for any gaps around the perimeter of the floor, cabinets, ceiling, and windows and caulk any openings you find, no matter how tiny they appear. Close windows securely and shut blinds and curtains to keep out the damaging UV rays of the sun.
Exterior Cleaning and Preparation
Wash the exterior of your RV with a cleaner meant to cut through black streaks and mildew. Pull out your sewer drain hoses and sanitize the insides with a bleach water rinse. Let dry and store.
Carefully check all the seams on your roof for wear. Repair any holes or cracks with the appropriate caulk for your type of roof material.
Open any basement compartments and vacuum, wipe down, and seal any cracks or gaps. Spray locks with a graphite spray lubricant.
Pull out your awning and scrub it well with a cleaner made for RV awning material. Allow the awning fabric to dry completely before you roll it back up. If you store any camp chairs or other furniture inside your RV make sure to wash those items with vinegar and dry them before you store them away.
#3 – Prepare Appliances
Evaluate if the furniture and appliances are in good working order. Now is the time to replace or repair any large items, so you’ll be ready to take off on your next adventure when you return to pick up your RV.
Unplug all the appliances and flip the RV’s main breaker off. Remove batteries from smoke and CO detectors and leave them sitting on the counter. This step will remind you upon return that your detectors need fresh batteries.
Remove dry cell batteries in flashlights, clocks, radios, or other items. Clean the filter in the air conditioner.
#4 – Cover Openings
The next thing you need to do after cleaning is start covering any holes, like vents in the roof for exhaust fans and appliances. This step will keep rain, insects, and rodents from entering your RV.
Cover the exterior of the air conditioner with a premade shroud made to fit your model or wrap it with thick plastic sheeting and secure.
For other vents and holes, you can use a fine mesh-like extra piece of window screen and tape the edges down with a strong, yet removable tape. If you own a motorhome, don’t forget the exhaust pipe.
Check for holes inside your outdoor access door where your electric cord enters the RV, and spots inside your water heater and propane connections that may lead into your camper. Stuff pieces of mesh or steel wool inside these cracks.
Keep a notepad with a list of all the areas where you put covers over vents or put steel wool fillers so you can remove them all before you begin your next trip.
#5 – Motorhome and Generator Engine Maintenance
For those who plan to store a motorhome, you need to take extra steps to maintain the engine while in storage, so it starts right up when you return.
Fuel and Fluids
Top off your fuel tank and add a fuel stabilizer. Run the engine to allow the fuel stabilizer to flow through the engine. Make sure the radiator is full of antifreeze.
Have an oil change before storage and confirm the brake fluid is full. Drain your windshield wiper fluid tank or fill it with antifreeze.
Lubricate the full chassis to protect components from rust while idle.
Battery Care
When you own a motorhome, you have extra care you must take with the engine components like the battery.
If at all possible, store your motorhome at a location near enough to visit monthly. Start the RV if you can, but make sure you remove any coverings you may have put over the exhaust pipe.
Let the motorhome run for 20-30 minutes, to keep the engine fluids flowing and to charge up the batteries.
For long-term parking, it’s better to remove all the batteries from the coach and keep them in a climate-controlled area where you can keep them at full charge.
Don’t place batteries directly on a concrete floor, as this can cause the power to drain. Don’t forget to remove your RV’s 12-volt batteries too!
Generator Prep
If your RV has a built-in generator or you carry a portable unit in your camper, you must perform maintenance duties to keep it in good working order.
If you can run the generator at least once a month, start it up, give it a few minutes, then apply a 20-30 amp load, like turning on the air conditioner. Let the generator run for 30 minutes, reduce the load, then turn off the generator.
For long-term storage drain the fuel by shutting the fuel valve and run the generator until the gas runs out. Disconnect the fuel line, remove the spark plugs, and add some motor oil to each cylinder. Perform an oil and filter change.
You can also top off the tank, add a fuel stabilizer, and let the generator run several minutes. Your fuel tank should be no less than 3/4 full to prevent condensation inside the tank while sitting in storage.
#6 – Prepare Propane Tanks
When storing your RV, you can either remove your propane tanks and store them at home or top off the tanks, which helps withstand temperature fluctuations.
Shut off the supply line and cover all the tanks. For propane tanks that are within a basement storage area, remember that insects, namely spiders, are fond of the scent of propane.
If the thought of a big nest of spiders or wasps in your propane compartment gives you the willies, you may choose to remove the tanks and store them outside the RV.
Verify that all LP gas appliances are off and turn off the main LP gas supply valve. For those with a pop-up camper or a travel trailer, cover the LP gas regulator.
If you do not disconnect or remove the 12-volt RV batteries, make sure you pull the fuse for the LP gas leak detector to stop the discharge of the batteries. Leave the fuse with a note on the counter to remind you to replace it before your next trip.
#7 – Tire TLC
RV tires are an expensive investment, so keeping them in good shape when your RV is in storage is critical.
The tires on a recreational vehicle continue to deteriorate even when they are not being worn down by travel. So what is the best way to keep your camper tires in good condition when in storage?
Start by making sure your tires are at the manufacturer’s recommendation for inflation. If your RV has leveling equipment, use the jacks to relieve the tires of some of the camper weight stress.
For a pop-up camper, tilt the box on an angle to allow snow and rain to run off to reduce extra weight on the tires.
For parking on any surface, another way to protect your RV tires is to use blocks underneath. Blocks can be of plastic, rubber, or even cuts of wood. You need to support the entire footprint of the tire both in length and width, with no section of the tire hanging off the block. Creating a barrier between the ground and your camper tires will help protect the tire material, but the flat surface will still form tire flat spots that can damage the internal structures.
To preserve the shape of your RV tires, and keep it off the ground, the best parking blocks feature a concave shape that holds the tire with no distortion.
Moving your RV every 4-6 weeks will give your camper tires a chance to round out and help stop flat spots from occurring, but this option isn’t feasible for many who put their RV in storage.
No matter where you park, a set of RV tire covers will keep the dirt, UV rays, and rain off your tires, helping you keep them in ideal condition.
What Parking Surface Is Best to Park on If I Don’t Have Blocks?
Concrete is the least damaging surface to park your RV tires on directly.
Asphalt has oils in the tar that can eat away at the rubber in your tires.
Direct contact with sand or dirt allows moisture to work into the tire that can corrode the steel inside.
Gravel that is deep enough will keep moisture away from your tires, but uneven pressure from the stones can still cause weak spots over time.
#8 – Pest Control
Preventing insects, like ants, and rodents from getting inside your RV when it sits for weeks on end can be a challenge.
Small rodents can squeeze into the slimmest of crevices into your RV and chew your electrical wiring, furniture, clothing, carpet, and more.
There are countless insect and rodent repellent products and homemade concoctions that RVers swear by when putting their RV into storage. Mothballs will leave a lingering scent inside your RV after storage, and peppermint oil dissipates quickly and loses effectiveness after a week or so.
So what works for long-term storage?
Sprinkling diatomaceous earth inside your RV along edges and inside cabinets will attach to and kill insects. Non-food-grade diatomaceous earth is not meant to be inhaled but is more effective on insects.
Using a long-term bug-defense spray inside and around doors and windows outside your RV will also work to deter insect infestations.
Liquid ant traps are effective, inexpensive, and easy to place within your RV’s inside cabinets. You can also set them at the base of each tire. The traps work because ants bring poisonous bait back to their nest and queen, which kills the whole colony.
Rodents love RVs because no matter how much you remove from your camper during storage, there is still plenty of material for them to chew up and make into a nest. Sealing points of entry and using plastic bins are number one for stopping critters.
Next up are poison bait traps and regular snap traps. These can leave dead rodents you’ll need to locate and clean up when you open your RV up after storage, but they do work to keep critters from overrunning your camper and destroying your belongings.
Many RVers recommend using dryer sheets to keep mice out. For the price, you can tuck a whole box into every nook and cranny, and if it doesn’t keep all the critters out, at least it helps reduce any musty smells from your camper being closed up.
#9 – Cover the RV
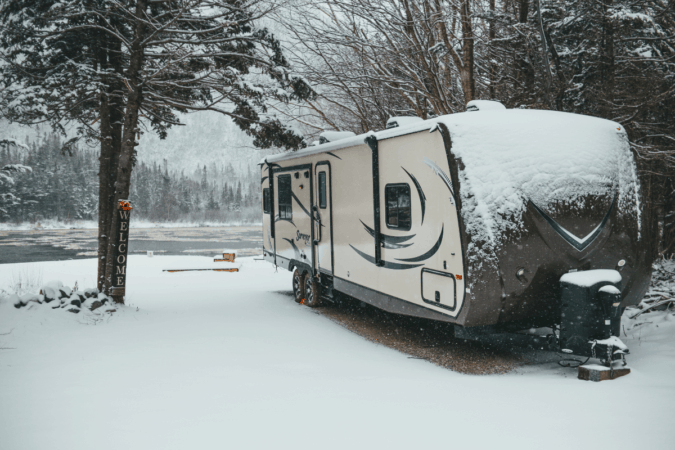
It’s a great idea to cover your RV during storage, whether you park it inside or out.
Keeping rain, leaves, sap, sun rays, dust, snow, bird droppings, and insects off your RV will maintain the exterior finish. Choosing a breathable RV cover will keep mildew and mold from forming.
If your storage facility has carport covers, pay extra to park under one if you can fit it into your budget. The additional protection for your RV is worth every penny. If undercover parking is not available, avoid parking under trees to stop squirrels from climbing on your RV, and keep falling branches from damaging your camper.
5 Things to Consider When Purchasing an RV Storage Space
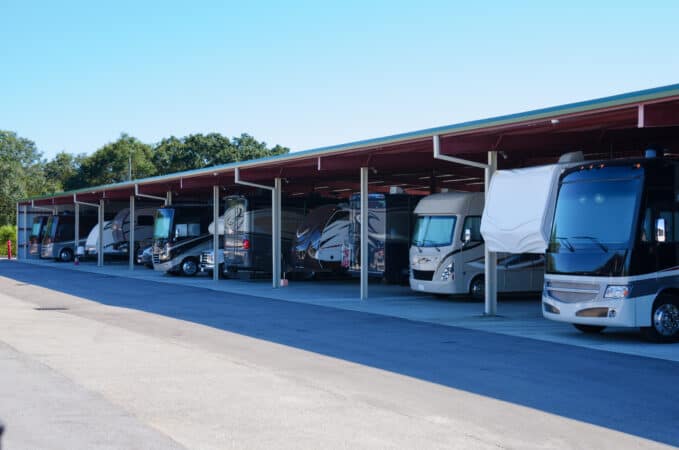
# 1 – Do You Want Indoor or Outdoor Parking for Your RV?
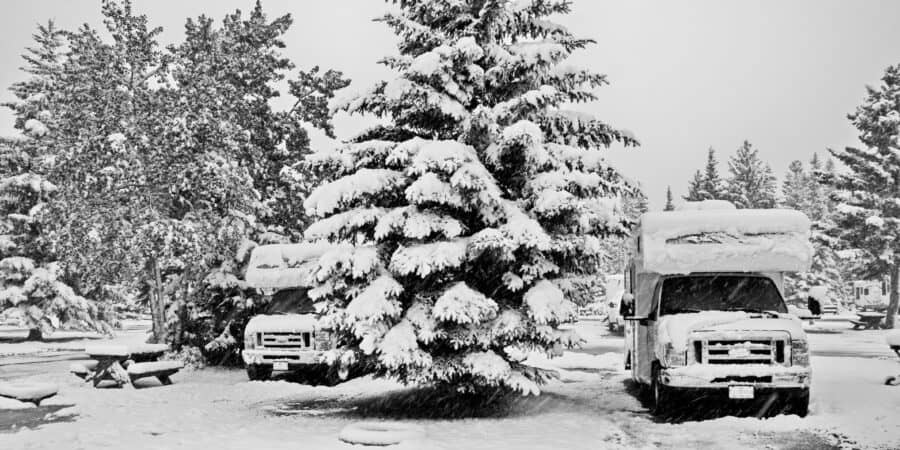
Outside parking is the cheapest option, but even with a quality RV cover, you can expect the elements to affect your camper. Wind, sun, rain, hail, and snow exposure will deteriorate paint, roofing material, awnings, vent covers, tires, and caulking faster.
For the most protection, parking under an outdoor cover or using inside storage will save you money over time in maintenance costs.
Not all storage facilities are the same. Some only offer outdoor parking in a field and also allow parking for boats, trailers, and other vehicles, which can make finding room for your RV to maneuver into a spot difficult.
Never pick a storage facility sight unseen.
#2 – Does the Facility Offer Security?
Choose a place to store your RV that offers the most security features within your price range.
Security measures like fencing, video cameras, patrols, key-codes, and lighting can all play a part in keeping your RV safe. The more features a storage lot offers, the safer you are from break-ins and from being hit by other vehicles moving about the lot.
You want to feel that your home-on-wheels is secure at the storage location.
Some facilities have minimal to zero security. A fantastic price could be in direct relation to inadequate staffing and security measures.
#3 – Does My RV Insurance Cover Time in Storage?
Damage can occur while your RV is in storage, so make sure your RV policy covers time while in storage. It may only cover your RV if certain parameters are met, such as security measures.
If no coverage is in effect while your RV is in storage, see if the facility offers its own insurance onsite. Just make sure your RV has coverage at all times since repairs can be costly.
#4 – What Surface Will My RV Be Sitting on and Under?
Don’t pay a premium to park on grass, rocks, dirt, sand, or asphalt. Cement is the best surface for your RV tires for long-term parking.
Even with cement, make sure you visit the facility after a rain, to see if your spot has standing water which will ruin your tires in no time. Check your potential parking place for proper drainage and use parking blocks to keep your tires off the ground.
Don’t park under trees or close to busy roads, where more debris will land on your RV.
#5 – What Amenities Are Available?
While prepping your RV for storage, and when opening your RV back up for use, having power available near your parking spot is nice to have.
A water line is another nice touch that allows you to clean up your camper on the spot.
Space to park, turn, and back up your RV is vital. Some storage facilities cram campers in like sardines, making it difficult even to open your door. Some offer plenty of square footage to park and walk around your RV, so you can button up the details before you leave it in the storage yard.
How Much Is Monthly RV Storage?
Monthly RV storage rates start at around $50 a month and can reach $400 or more. Prices vary due to parking options like
- Outdoor field (grass, dirt, gravel)
- Outdoor cement pad
- Outdoor with cover
- Indoor
- Indoor with climate control
The size of your RV will also determine your final cost, as well as other amenities like power, water, and security.
A great way to offset storage costs is by finding a facility near your favorite camping spots. Storing your camper near where you’ll use it most will save you time, wear and tear, and fuel expense by not having to pull or drive your camper hundreds of unnecessary miles.
Conclusion
The first time prepping your RV for winter storage is the hardest.
Make notes as you follow the storage routine and keep it for reference every time you store your RV to avoid making any mistakes. When the time comes to open your RV back up, you’ll be happy to have a clean, damage-free camper that needs a minimal amount of time to make travel-ready again.
I hope the tips in this guide aid you in preparing your RV for storage and help you pick the right storage facility for your camper, which you can see more about in the video that follows.
Do you have tips that make the RV storage preparation process easier? Share your ideas and help others in our RV community!


Hi there! Such a good short article, thanks!