Going on a weekend adventure with a trailer towed by my trusty car has always been my dream. Like many, I thought it would be impossible. After all, I had limited funds, and sometimes even limited weekends. After exploring for months, I’ve finally found the answer to my adventuring: teardrop campers.
What are Teardrop Campers?
Before we get started, it’s good to begin with the basics.
Let’s first focus on terminology. For the purpose of this article, teardrop campers and teardrop trailers are the same. The terms are used interchangeably by camper enthusiasts and can be a source of confusion for some folks. Clearing this up at the outset should help with any ambiguity.

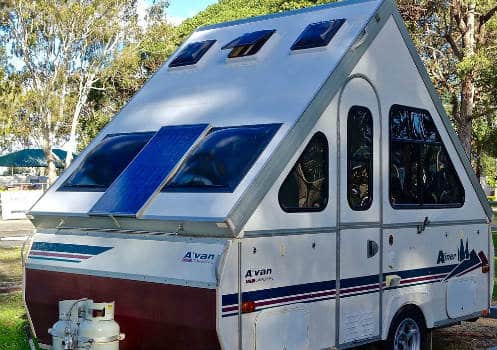
For those of you who are only starting out in camping, it may surprise you to know that not all trailers have to be big. Teardrop trailers are compact, lightweight and streamlined trailers with a characteristic shape. Most teardrop campers have enough space to accommodate two sleeping adults and a small kitchen, which is generally accessible from the rear.
Why Choose a Teardrop Camper?
If you’re like me, it might take you ages to decide on what trailer to get, and/or whether to buy one or build one. At the end of the day, my options were significantly reduced by several factors – my budget, my expected destinations, and my car. Though you might be concerned about other factors, a good first step is looking at what’s important to you.
The Popularity of Teardrop Campers

There are a lot more options for teardrop campers in the market than I expected. For something that started becoming unfashionable in the 60s, teardrop campers are definitely making a comeback. Its unique teardrop shape, lightweight, and popular design are as popular now as when the trailer was invented in the 30s. With the viral popularity of tiny homes, you can even see couples living on the road with teardrop trailers.
The popularity of teardrop campers also means there are now several starter kits and guides on how to build your own. After a lot of research and deliberation, I decided to start my own adventure from scratch.
How Much Does a Teardrop Camper Cost?
Like any other trailer, buying a teardrop camper can cost you several thousand dollars. On average you can get a high-quality teardrop camper for US,000, with different models dancing around that average base price. Most of these models offer the basic features of any teardrop camper, such as a sink and a standing room. For really high-end products, you can get a teardrop camper for upwards of US$20,000.
Price of Current Teardrop Trailers
Any trailer’s cost will climb up if you keep adding accessories and special features. Increasing the size will also drive up the cost by the thousands. You can choose to add a solar-powered electrical system to make a living in your trailer more sustainable in the long run, or a roof rack. Another popular modification is adding custom cabinetry and hooks for assorted equipment.
Pros and Cons of Buying a Teardrop Camper
The pros and cons of buying a teardrop camper depend entirely on what you prioritize from an outdoors adventure. If you own a truck instead of a small car, for example, you might get more value for your money if you buy a slide-in camper. That option would give you more versatility and living space.
An example of a slide-in camper:
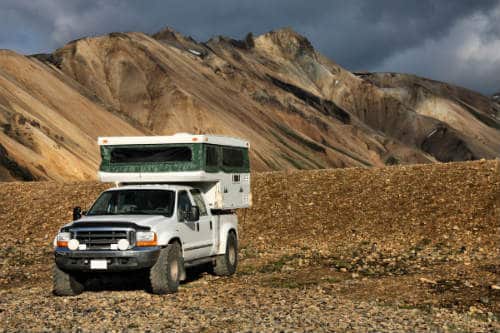
One of the biggest pros of buying a teardrop camper is the convenience. You won’t have to spend weekends building your own teardrop trailer from a starter kit or from your own design. Plus, the amenities are more likely to be seamless because they were professionally installed.
On the other side, there are no cheap teardrop campers in the market. The cheapest will probably cost you at least US$5,000. That’s a high price you won’t see if you build your own.
How Much Does it Cost to Build a Teardrop Camper?
If you were as hesitant as I was over the current price of most teardrop models on sale, you might want to consider building your own teardrop trailer. There are two main options to get started.
If you’re not confident with your carpentry and construction skills, several great companies sell teardrop trailer kits. From what I’ve seen, these kits are easy to follow.
The second option is learning more about how a teardrop camper works and building one from your own design. If you want your camping experience to feel truly personal and authentic, building your own teardrop camper is an interesting and exciting start.
Cost of Teardrop Trailer Kits
What does a trailer kit contain? A whole trailer kit for a teardrop camper will include everything you need to put the trailer together. A partial trailer kit often contains only the walls of the trailer. With these kits (plus shipping), you can expect a price up to a thousand or even more. There might not be much of a difference between buying a premade trailer and buying the more expensive kits. The only difference is the labor and experience of putting it together.
There are cheaper kits that drive a more significant cost difference. For example, a partial kit containing only pre-finished side walls with door cutouts, an easy-to-assemble hatch kit, and guidebook can run up to US$600. You can just imagine the other costs you’d have to pile on top before you have a fully functional trailer; it will still run up to a couple thousand dollars.
Cost of a DIY Teardrop Camper Trailer
I found that most people who want to camp with a teardrop trailer want to either buy a fully outfitted model or build everything themselves from scratch. It’s probably why there aren’t plenty of companies supplying teardrop trailer kits.
For a very basic teardrop, you can get away with only spending US$500, especially if you have most accessories on hand. Most trailers already start off at a couple hundred bucks. If you buy a used trailer for US$150-200 online or from a friend, you can definitely make things work out for you. Still, with a total cost of US$500, you’ll be settling for clean walls, a sealed floor, and a good hatch.
For a more complete package, you can build a trailer for an average cost of US$2,500 to US$3,500. Similar to premade completed teardrop campers, the price increases as you add more features and accessories.
Here’s a simple rundown of the probable cost:
- Trailer – US$400
- Sealed Plywood Floor – US$80
- Wood for Roof and Hatch – US$140
- Doors – US$900
- Storage Galley – US$100
- Camper Fan – US$150
- Electric Cost – US$400
- Watercoating Finish – US$120
The total’s at US$2,290. You can drive this down even more if you use a secondhand trailer, door or even camper fan. Keep in mind that the prices above only feature a storage galley with no working sink or stove and other kitchen accessories. You’ll definitely end up with a higher bill if you go all out with the accessories and bolts.
In any case, building a standard 4×8 teardrop with yourself in mind for only US$2500 is still a lot cheaper, and maybe better, than anything currently on the market.
How to Build Your Own Teardrop Camper?
If you have decided to build your own teardrop camper from scratch, congratulations! With the right planning and research for materials, you will create a teardrop trailer you can genuinely be proud of. The benefit of saving some money is a definite plus.
What to Expect
Each big step or part in construction your DIY teardrop camper takes at least a day for most first-time builders. If you have a full-time job like me, be prepared to spend several weekends on this project. It can take anywhere from a month to three months depending on your pace. The more days you can spend on your camper, the faster you can start adventuring.
You don’t need to have any sort of certification to start building a teardrop trailer. You can start building with only a basic experience in woodworking. I just use the usual tools in my yard. The rest of the things you need to know can come entirely from this guide.
Planning Your Teardrop Trailer
One of the biggest determinants of the cost and construction schedule of your camper is the size. Will you be going for a standard 4×8, or something bigger? Planning out the size will help guide you in the next steps when it comes to buying your materials, cutting out your walls, and installing any fixtures.
With a budget of US$1500-2000, you can already have a complete and comfortable trailer, especially if you use secondhand materials or if you cut down on extra accessories. As I mentioned earlier, the amenities you want will also affect your shopping list and your budget. If you want a functional kitchen in your galley, be prepared to shell out more dollars and an extra weekend.
Part One: Trailer
The trailer of your teardrop camper is literally the foundation of the rest of the project. I recommend spending up to your budget for a heavy duty utility trailer that fits the size of your teardrop design. To save up some money, you can wait out for a discount (that’s what I did!), or you can ask around for a used trailer.
Once you get your trailer from the mail, it can be easy to get overwhelmed by all the tiny parts. You shouldn’t worry yet because this is one of the easiest parts of the entire process. All you need are your screwdrivers and wrench.

- 27-piece magnetic ratchet wrench and screwdriver set for easily...
- 3 driver settings: clockwise and counter-clockwise ratcheting and...
- Made of chrome vanadium steel that has been heat treated for...
- Plastic storage case included with dedicated space for the...
- Measures 6.8 by 3.7 by 1.3 inches; backed by an Amazon Basics...
I decided to paint the sides of my trailer black afterward. After it dried, install the wheels and the trailer jack. You can wait to put the fenders until after the rest of the teardrop is built.
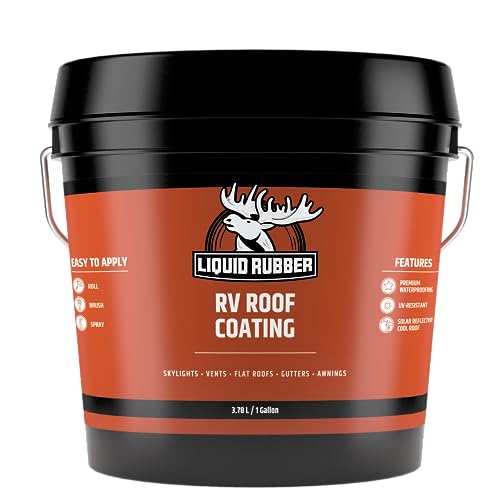
- FLEXIBLE RV ROOF COATING - Solar reflective, cool roof & UV...
- PROTECTIVE SEALANT FOR - RV roofs, metal roofs, flat roofs around...
- EASY TO APPLY - Just like painting! Apply by brush, roller or...
- ENVIRONMENTALLY FRIENDLY - Liquid Rubber RV Roof Coating is water...
- COVERAGE - Apply a minimum final thickness of 1 gallon/50 sq ft...
No one wants an uneven camper, so before you move on to the next step, check the angle of the corners. They should all be 90°. The tip of the tongue should also be at the center of the wheels.
Part Two: Floors
Plywood, such as birch plywood, is the favorite material for floors and walls.
Use a table saw, and a miter saw to cut your plywood into the right size (2x2s) for a floor frame. Five rows should be enough to keep your floor together. I held the frame together using metal angles as well as exterior screws. These exterior screws make sure that the floor can do well even in humid conditions.
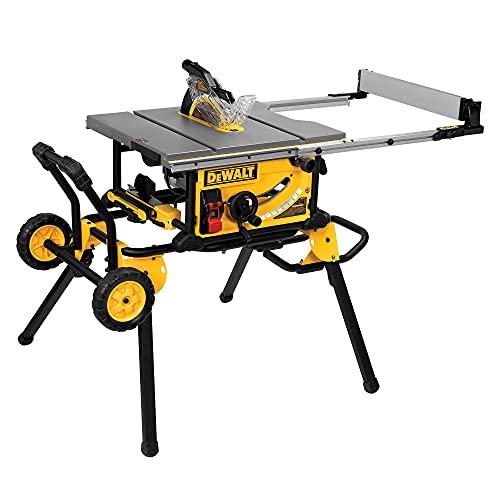
- Your purchase includes one Dewalt table saw, 10inch 24-tooth...
- Other Specs: Max rip to left of blade – 22inch | Max rip to...
- Rolling stand designed for easy set up and breakdown with...
- Rack & Pinion Telescoping Fence System Make fence adjustments...
- Features a 15.0A high torque motor with the power to cut pressure...
Measure a 1/2″ plywood on top of the frame. This will be the floor of your teardrop.
The next part of waterproofing and insulating your floor will take a day on its own. Paint each section of your floor with the tar-like emulsion except for the very edges (you’ll be gluing the walls to the floor edges). Screw the hard foam insulation in place with big washers. The emulsion will also help stick the foam to the floor.
Add another piece of plywood where the spare wheel will hang under the trailer.
It will take a couple of days up to a week to dry the emulsion. Take the time to assemble other pieces, like the vent and walls.
After it dries, bolt the floor to the trailer. It definitely helps to align the floor frame and the trailer first and to clamp it in place.
Part Three: Walls and Doors

You can make the outer walls out of 1/2 plywood. Because we’re making a teardrop trailer, practice drawing that iconic shape. Pencil the outline, including space for the door, on the wood.
In my experience, it’s better to cut each wall one at a time. Don’t try to stack and cut the two walls together.
You can use a 5mm plywood to line the interiors of the wall. Basically, you’ll have a wall made of the 1/2 plywood, hard foam insulation, and then the 5mm plywood. You can also design holes into the inner wall, which will make the walls lighter and also give space for wiring.
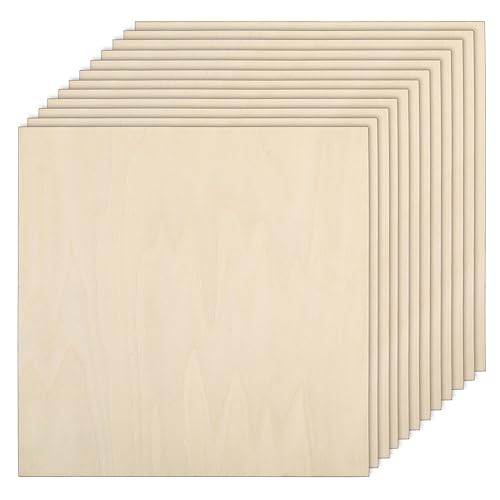
- 【PLYWOOD BOARD SHEETS】:The package included 16 packs of...
- 【THICKER WOOD MATERIAL】:The basswood sheets are made of...
- 【EASY TO CUT】:Our wood board sheets are cutting-friendly and...
- 【WIDE USAGES】:The balsa wood sheets feature good rigidity and...
- 【DIY CRAFT SUPPLIES】:Our craft wood has unfinished smooth...
Sand the edges down, and paint the bottom edge with the tar-like emulsion to protect against humidity.
Attach the walls with a right-angle jig. Glue and secure with exterior screws to the floor frame. To attach the insulation, you need to frame the edges of the wall and the door. Add the installation and the inner plywood after the wiring is inserted.
Installing the electric parts can take an entire weekend alone. If you’re not used to working with wires, it is essential to be as by-the-book as possible.
The best thing to do is to create a basic schematic for your wiring installation. I started with the wiring for essentials like the main lights and the vent. You can add wires for porch lights, reading lights and media equipment as you become more confident.
Once you’re done, all that’s left is screwing on the doors.
Part Four: The Galley
For the wall separating the sleeping area and the galley, you can use a similar layering scheme with insulation. If you’re installing any electric kitchen appliances, your wiring schematic should include a connection through the plywood divider.
If you aren’t confident about your skills, you can probably stop with a simple cabinet design for the galley. The galley can always be used for storage. You can also rely on battery-powered kitchen appliances. I ordered a sink-gas-stove combo, faucet and water pump for my basic kitchen in the galley.

- 【HIGH QUALITY MATERIALS】Boat Caravan RV Camper Burner Gas...
- 【THREE DIMENSIONAL AIR INTAKE】Three-dimensional air intake...
- 【MAIN PARAMETERS】Gas Burner with Sink Combo, Mode: GR-903,...
- 【FREE FIRE ADJUSTMENT】Multi-level fire adjustment, free...
- 【WIDE APPLICATION】RV Gas Burner Stove, flame failure device....
You can also build the entire cabinet area and kitchen separately from the rest of the teardrop, and just install it in later.
Don’t forget to design and install a hatch support bar to keep the galley door open as you camp out.
Part Five: The Roof and Finishing
Time to finish off the teardrop camper. The roof is one of the more challenging parts at a glance.
Add roof spars or plywood bars crossing the two side walls to create a guide for the exterior roof. Keep in mind the spaces you need for the vent and for any windows. Screw in the interior layer of the roof. I used 1/8 plywood for both interior and exterior walls.
Like the walls, add in foam insulation after settling the electric wires.
You’re almost finished! Just stain the interior of your camper with the right finishing coats. Paint the exterior of your camper with a good dye for color, and epoxy for the finish. Install the doors, windows, and other accessories you’ve decided to add.
Finally, you can build the hatch and start your adventure.
See the video below on how to build a teardrop camper:
Another video on 7 of the best teardrop trailers for comfortable traveling:
Conclusion
Getting ready for the road is never easy. Whether you choose to buy a completed teardrop trailer, or you choose to make your own, you’ll find yourself trading in at least half a thousand dollars. Personally, nothing is as satisfying as designing your own camper and enjoying an adventure with a trailer you made yourself. Nothing is as cheap or efficient as well!
While buying a teardrop trailer is more convenient, I just can’t see it as worth it yet. If you love adventure and if you’re not afraid to get your hands dirty, I definitely recommend building your own teardrop camper.
The comfort of having your own place while on the road is really incomparable. I can’t remember the last time I had to waste money on a motel room or struggled through a tent. After a lot of research, I’m happy I got to go through my options. With only a couple of weekends and some careful planning, you can also tow a new custom teardrop.
Share your designs and finished projects with me! I’m curious. Will you add on an aluminum siding on your exterior walls and roof? What size of camper are you thinking of? I especially want to know how creative you are with your galley area.
Product data was last updated on 2024-04-19 at 11:50.