Does your Class A motorhome have problems changing gears? Is there a noticeable delay in acceleration when the gears shift? Do you hear strange noises from the transmission? Before your panic monster gets the better of you and your motorcoach has over 50,000 miles on it, it may be time for an RV transmission fluid change. In our Yes You Can series, we’ve shown you how to change your oil and how to take care of the various fluids and filters on your Class A RV. With that same positive attitude and a little guidance, Yes, You Can Change Your RV Transmission Fluid!
If this is your first adventure performing an RV automotive maintenance procedure, we recommend starting with the oil change or fluid and filters first. If you’re ready to tackle this challenge or need some extra encouragement, we’re going to be with you every step of the way. YOU CAN perform the RV maintenance on your Class A motorhome. Some repair situations require professional work. Changing your transmission fluid at Jiffy Lube, the average price hovers around $150 for a passenger car. Why not spend a lot less doing it yourself and use the rest to celebrate your accomplishment. You can do this, and you’ll be great at it.
We’ll walk you through the process and how to set yourself up the right way. You’ll know everything beforehand so that you can walk into the auto parts store with confidence. Suppose you have a Class B or Class C motorhome. In that case, the process has some similarities to the gas Class A RV. Check your owner’s manual to learn the slight variations, seek advice from a professional mechanic, or check out our upcoming article for Class B and C RVs.

Camper Smarts Tip on Using This Guide: The best approach is to read it through first. When it comes to the actual process, the gas section and diesel are independent of each other, so you don’t have to worry about missing anything. Once you have a good idea of the procedure, get your supplies, get psyched up, and we’ll tackle this adventure together.
What is Transmission Fluid?
As you learned from the fluids and filters discussion, the color of transmission fluid is pink or transparent red. In an automatic transmission, the fluid’s primary purpose is to provide the necessary medium for the torque converter to operate, as well as displace heat inside the transmission, through the transmission cooler. In a pinch, you can substitute automatic transmission fluid (ATF) for hydraulic fluid in your power jacks. If you run out, you can also use ATF instead of power steering fluid without damaging your RV.
Do You Really Need to Change the Transmission Fluid?
There are differing opinions on the right time to change your transmission fluid. Gas auto manufacturers recommend replacing it around the 100,000-mile mark. Some Ford transmissions have recommendations as high as 150,000. Mechanic experts generally agree you should change the fluid between 30,000-60,000 miles. As discussed in this iRV2 thread, when doing a simple RV transmission fluid change yourself, you won’t necessarily get all of the fluid out of the torque converter, so you may change the fluid more frequently than if you had a shop pump it out.
For your diesel Class A motorhome, the owner’s manual will have a chart in it that recommends changing the ATF fluid and filters every 50,000 miles/24 months when you use the TranSynd fluid. Other versions will say 25,000 miles/12 months. The only exception will be after the first 5,000 miles/12 months the RV travels. There are a few reasons the experts are conservative with their advice. Transmission fluid breaks down over time. Since it displaces heat from the transmission, it goes through a constant temperature change flux, especially when you first start your vehicle. As you continue to use your motorhome, most of the contaminants fall into the transmission pan or filter, but some stay within the fluid.
Some indicators will let you know if you need to change your transmission fluid sooner than later. You may hear thumping, grinding, or other weird noises. You’ll notice performance issues like a delay in acceleration, gear slipping, and other shifting troubles. The transmission itself is well protected, so any outside road debris rarely affects the component. The gears in your motorhome use strong metals and are dye cast. These molded parts rarely wear down, so most of the time, it’s a fluid issue, not a part problem.
Which is better, a Transmission Flush or Change?
A transmission flush runs your transmission fluid through a machine. A cleaning solution is run through the whole system until it comes out clean. Then your transmission is refilled with new ATF fluid. The process is more expensive than a transmission fluid change. The benefit is a cleaner transmission. You’ll find that transmission flushes aren’t worth it. Most auto manufactures recommend against them. If you read your paperwork, you find that a transmission flush may void your warranty. The cleaning solution can potentially damage the transmission, so they prefer changes over flushes.
Preparing For the Transmission Fluid Change
Psyching Up
We need to put our playlist together. I think this time we’ll go with the 1990s grunge and rock scene: Nirvana, No Doubt (Gwen before Blake), Aerosmith, Depeche Mode, and everybody’s favorite earworm Chumbawamba.
For wardrobe, you should have those well-worn jeans and t-shirt stashed away for these projects. If you have oil and auto fluid stains on them, those are badges of honor. Wear them with pride. Don’t forget your mud shoes! This project may get messy. Make sure you have your safety goggles and disposable gloves. You’ll probably need 2 or 3 pairs of gloves for this one.
What Type of Transmission Fluid Do I Need?
Your owner’s manual will tell you the type of ATF fluid you need. If you put the wrong type of RV transmission fluid in, it won’t lubricate or remove the heat correctly. When you go to the auto parts store, you’ll find ATF fluids that are brand specific, domestic or foreign specializes, and multi-vehicle versions. The multi-vehicle ATFs work well for the gas engine Class A motorhomes.
It’s rare to find a diesel Class A motorhome that doesn’t use an Allison transmission in the past few decades. Whether you have a Freightliner or Spartan chassis, Allison is the go-to transmission. That’s why it’s a reasonable assumption your Cummin’s engine works with some version of an Allison brand transmission.
Allison recommends TranSynd fluid for its products. It’s a synthetic transmission fluid designed for their transmissions. You can go to their website to learn about other formulations that work with their products. Your owner’s manual will also let you know how much fluid you’ll need. If the booklet gives you an amount for transmission that is different than what you have, always go with the bigger number. If nothing else, it’s always a good idea to have extra transmission fluid in your tool bay.
A big issue you need to watch out for is the gas versus diesel transmission fluids. Gassers shift at higher RPMs (revolutions per minute) than diesels. Some other factors don’t translate well. Make sure you’re giving your transmission the fluid it needs.
How Do I Find the Right Transmission Filter?
If you have the Ford chassis, Motorcraft is the parts division of Ford. Other brands like Wix should have the filter you need. If you have a diesel, your Allison transmission has a cylinder filter that looks like an oil filter or an open paper-like accordion cylinder. You’ll need to know which transmission you have so the parts fit correctly. Additional components like gaskets and magnets should come with the filter. Magnets are reusable, so don’t worry if your filter doesn’t come with a new one.
Possible Transmissions on the Ford F-53 Chassis (the first number indicates how many gears you have, i.e., “6” mean 6-speed:
- 4R100/E4OD
- 5R110W
- 6R140
Possible Transmission on Freightliner and Spartan Chassis:
- 1000MH (xFE)
- 1350MH (xFE)
- 2100MH (xFE)
- 2200MH (xFE)
- 2350MH (xFE)
- 2500MH (xFE)
- 2550MH (xFE)
- 3000MH
- 3000TRV
- 3200TRV
- 4000MH
- 4000TRV
What is a Torque Pattern?
When you’re installing your Class A gas motorhome’s RV transmission fluid pan at the end of the process, there’s a specific order you have to tighten the bolts holding the pan in place. The order ensures an even pressure all around the pan to avoid leaks. There are many ways to find out your specific pattern.
You can call your RV manufacturer or their legacy/heritage center if you have an older model. Forums like the iRV2 are a great resource. If you can’t find it, you want to tighten the bolts in a criss-cross pattern tightening them opposite from each other. The diesel Allison Transmissions have a different configuration than the Ford version, but you’ll still want to still to the criss-cross method. We’ll explain more during the process. The torque pattern is essential for the gassers.
Changing Your Gas Class A Motorhome’s RV Transmission Fluid One Step at a Time
Tool and Supply Checklist
- Electric screwdriver with adjustable torque settings
- Socket wrench bits to fit your electric screwdriver and an extension arm
- A manual socket wrench, multiple bits, and extension arm
- Multi-purpose oil jug with a collection pan on the side (a bucket works too)
- Bowl to keep bolts and other hardware isolated.
- RV Transmission fluid filter with an included gasket
- Blue shop towels (or paper towel)
- Scraper or chisel to help remove the old gasket
- Brake degreaser spray for cleaning purposes
- Circular sanding pad for your electric screwdriver
- RTV silicone adhesive sealant
- 2 gallons of RV transmission (check your owner’s manual for the right amount)
- Locating and Draining the Transmission Pan
Toward’s the front of your motorhome; you should see a metallic pan with bolts evenly spaced holding it in. Have the oil jug ready with the collection pan up, prepared to catch the fluid. We recommend using a separate jug than the one you used for your oil change. Most auto part stores will dispose of transmission fluid for you, but you can’t mix it with any other liquid.
Once you loosen the bolts a bit, start unscrewing one side. The ATF fluid will start drizzling out. You want to stagger your work. When the flow of the liquid slows, loosen the bolts some more. Once you have the end bolts out, work the sides until only the opposite end is left. At that point, finish unscrewing all the bolts and carefully bring the pan to the ground. There’s still a good amount of fluid in the pan.
Before you crawl out, the transmission filter is still attached. It’s a square piece that’s easily removable. Bring everything out into the open.
- Start the Cleaning Process, Starting With Removing the Old Filter and Gasket
Pour the rest of the ATF fluid into the jug and close it up. Set it aside to dispose of properly later. Discard the filter and the rubber-like gasket that borders the top of the transmission pan. It may be stubborn, so use a chisel or scraper to get it off. You need to be diligent when removing all remnants of the gasket. Any tiny piece will create a leak when you put the new gasket on.
Once the gasket is off, use a brake degreaser and the blue shop towels to thoroughly clean both sides of the pan. Pay special attention to the area where the bolt holes fit. Don’t forget to clean off the magnet. It collects metallic and graphite shards. If you served in the U.S. Armed Forces, would your drill instructor approve? Yes, that clean.
You can also use a hand-sized circular sanding attachment on your electric screwdriver to give the bolt tabs a quick once-over to verify there aren’t any rough spots or particles still attached. Be careful not to create any indentations.
- Attach the New Gasket to the Pan
Most part companies include a new gasket with the filter. Place the gasket over the pan and make sure it lines up with the bolt holes. It should match up perfectly, but you don’t want any surprises.
Put the gasket aside and grab the RTV silicone adhesive sealant. With your finger, rub a layer of the sealant on the bolt plates where the gasket will lay. Make sure you keep the bolt holes clear. Put the new gasket in place. Add another layer of RTV sealant over the gasket sandwiching the gasket between the silicone adhesive layers. Let the pan dry.
While you’re waiting for the pan to dry, this is a great time to crawl back under your RV and clean the exposed area of your transmission. Make sure the strip where the bolts plates will connect is drill instructor clean.
- Attach the Transmission Pan Using the Proper Torque Pattern
When you’re ready to attach the transmission pan, install the filter and hand screw the bolts in, but keep them at least a quarter-inch from tight. Double-check your torque pattern diagram, and follow through with the bolt tightening pattern.
Follow the steps below for the best method for adding the new transmission fluid.
Changing Your Diesel Class A Motorhome’s Transmission Fluid One Step at a Time
Tool and Supply Checklist
- Electric screwdriver with adjustable torque settings
- Socket wrench bits to fit your electric screwdriver and an extension arm
- A manual socket wrench, multiple bits, and extension arm
- An adjustable torque wrench set between 38-45 lb./ft.
- Multi-purpose oil jug with a collection pan on the side (a bucket works too)
- Bowl to keep bolts and other hardware isolated.
- Blue shop towels (or paper towel)
- Scraper or big flathead screwdriver to help remove the old gasket
- 4-8 gallons of new transmission fluid (4 quarts= 1 gallon)
- Locate the Transmission, Drain the Fluid, and Remove the Filters
Your transmission will look quite different than the gas Class A motorhome. Two circular pieces are independent of the main transmission housing. If you look at your owner’s manual, the diagram will help you locate the main housing drainage plug. Your transmission has the main filter and a lubrication filter. You’ll be replacing both of these. The manual will also talk about a “sump.” That is the internal reservoir for the transmission fluid.
You may need two oil jugs, depending on how much fluid your transmission holds. Once you’ve located the components and you have the jugs in place, loosen the drainage plug. If the first jug starts backing up, quickly move the second one in place. When it stops draining, replace and tighten the drainage plug, so you don’t forget to do it later.
The two circle-like parts on the transmission hold your filters. You can unscrew those bolts to remove the filters without opening up the entire transmission. Have your oil jug ready to collect ATF fluid. Once both are out, crawl back out into the open.
- Clean the Caps and Replace the Gaskets
The filter looks like a water filter with a paper-like accordion material in a cylinder case. The filter sits on top of a cap that you unbolted from the transmission casing. When you remove the filter, two rubber O-ring gaskets on the stem hold the filter and a third gasket that seals the cap against the transmission housing.
Remove the O-rings and third gasket. You may need to use a scraper or chisel to remove the sealing gasket thoroughly. If you served in the U.S. military, you want it clean enough to pass a drill instructor’s inspection. Any tiny spec could create a leak. Then use the brake degreaser spray to clean the cap on all sides.
When the caps look virtually new, grab the new seal gaskets and place them on the cap without fully attaching them. You want to see how to line them up later. Place the seal gasket aside and focus on the O-ring gaskets. Use some of the old transmission fluid to lubricate the new O-rings.
You’ll find that there are more O-ring gaskets than you need. Use only the ones you need. These filters fit different versions of the Allison Transmission. Roll the new O-rings in place. Lubricate the new filter inside the gasket to fit onto the cap and then place the seal gasket.
- Install the New Filters
When you install the new filters back into the transmission, you won’t need to screw in a bolt to hold it. The cap will sit in place without assistance. Screw the bolts in by hand, leaving a quarter-inch left to tighten.
You want to use a manual torque wrench set between 38-45 lb./ft. Don’t use an impact or electric drill to tighten the bolts. Allison warns not to overtighten the bolts due to potential damage to the hardware or the transmission. We’re making a big deal out of it because the manufacturer does.
Once both filters are in place, double-check the drainage plug and get ready to replace the transmission with new fluid.
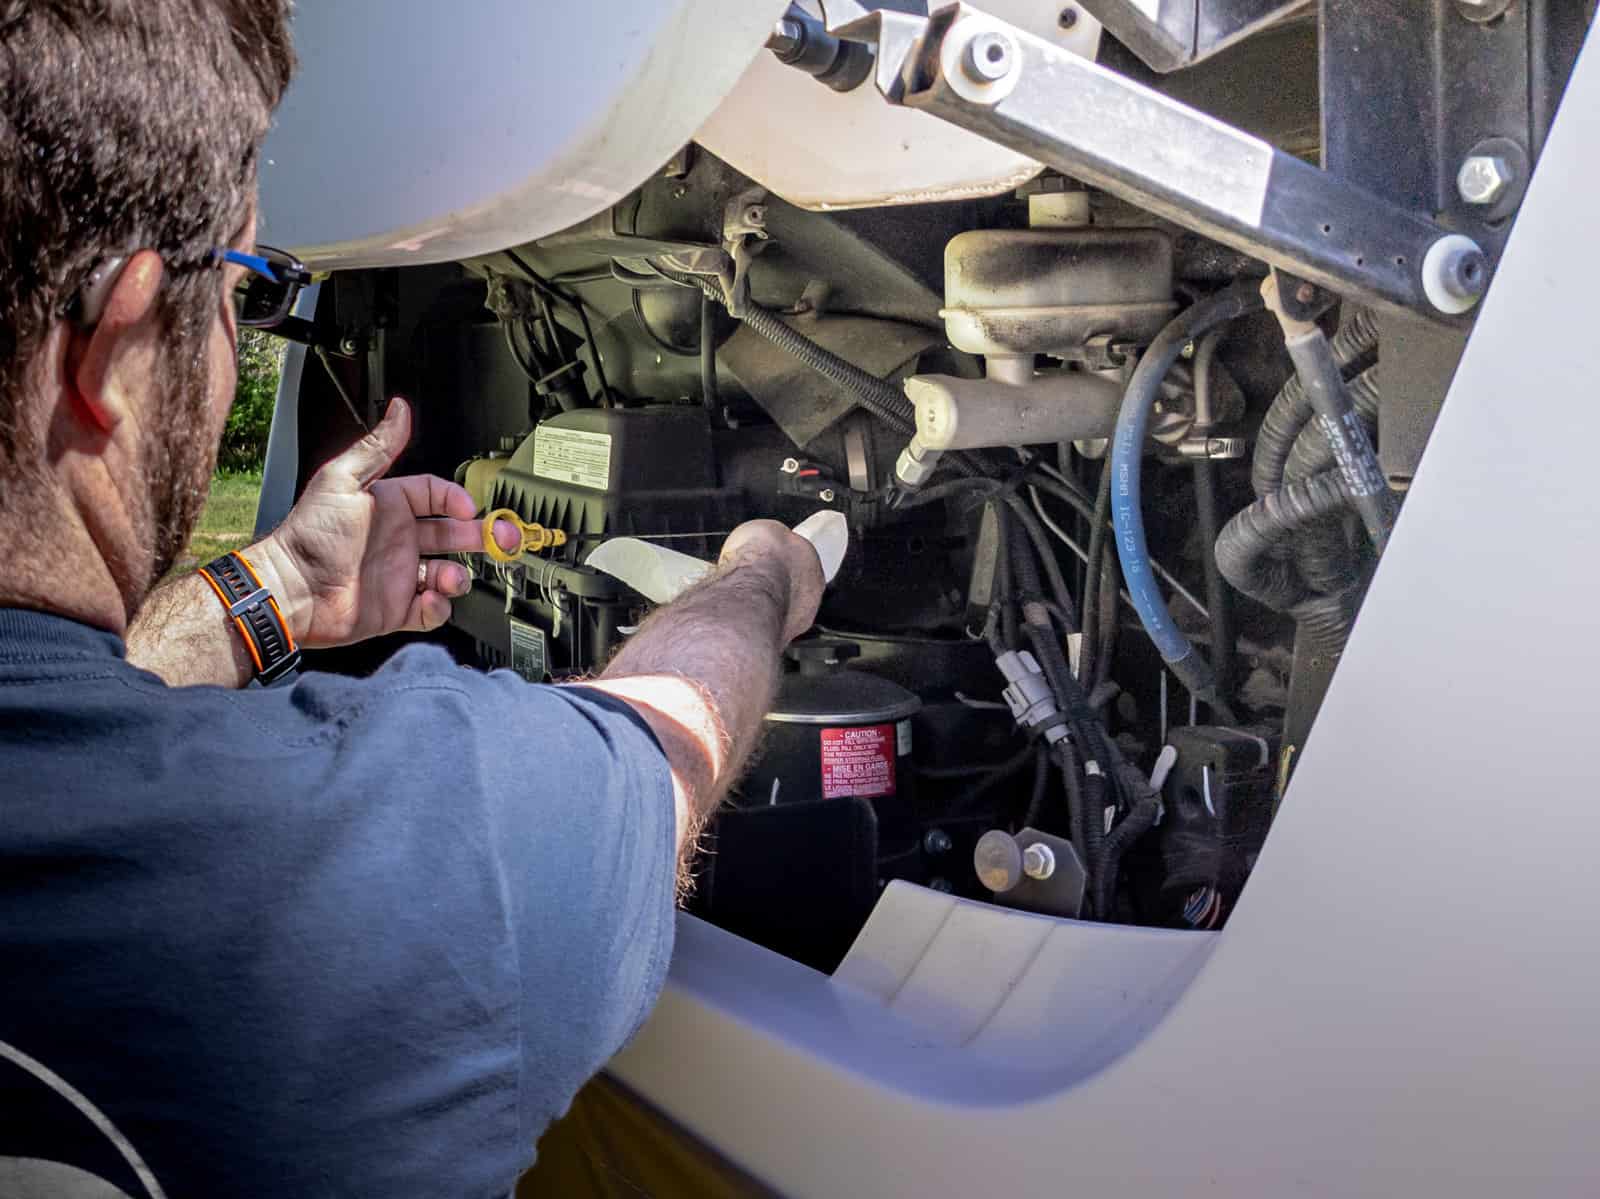
Adding the New RV Transmission Fluid Like an Expert
When you open the hood, you already know from the fluid and filters article that you fill the ATF fluid through the dipstick tube. An expert technique is to add three-quarters of the total amount of the fluid first. Then go inside and crank your RV up. Give it a minute or so to let the new fluid work its way through the transmission. With the parking brake on and your foot on the service brake, put your motorhome into reverse, drive, and back into park. You want to feel and hear the transmission go into each gear.
Go back outside and visually check underneath your RV for any fluid leaks as a triple-check. Since everything is tight, go ahead and finish filling up the transmission fluid. As you get closer to the total amount, start checking the dipstick. You don’t want to overfill your RV transmission fluid reservoir. Your diesel Class A motorhome may have a feature where you can check your transmission and fluid status by pressing a combination of transmission selector keys at the same time. Check your owner’s manual to learn how to do this and what each code means.
Congratulations! You Did It!
Now it’s time to sit down and relax (after your turn off the RV). Clean yourself up, break out your celebratory treat, and switch to your favorite relaxing playlist. Don’t forget to mark this on your RV LIFE Maintenance log from RV Life. That way, in 50,000-60,000 miles or 24-months, you’ll receive a reminder for the next RV transmission fluid change.
You can add notes, so you won’t need to look anything up again. You can even upload the torque pattern diagram because who wants to go through finding that again? You can also add your oil change notes and everything else for your maintenance. The best part, it creates a service maintenance record. If you ever need to provide a full report, it’s a click away. Save yourself storage space by uploading all of your receipts. You can access it on your computer and mobile device with your login.
Sign up for the Camper Smarts newsletter that comes out every Tuesday so that you can catch our next, Yes You Can step-by-step guide. While you’re waiting, you can also check out Do-It-Yourself RV and other great features through the RV Life network.
Happy Trails!
About the Author
Although he’s from Motown, Brian Newman is a legacy RVer that grew up on I-75. He, his wife, and two working-class fur-babies have enjoyed the full-time RV lifestyle since 2017. Like John Madden, he hasn’t “worked” in years because he gets to write about his passion. When he’s not working, he supports his daughter’s dog rescue efforts and disability causes.


According to Allison, non-synthetic ATF should be changed at 25,000-mile intervals. Synthetic TranSynd at 300,000 miles.
Great description and video of the process. Thanks!
Half the people with motorhomes can’t change a light bulb let alone a filter and fluid. I agree everyone should work on their motorhomes or at least try. I have an old car and I suck out all the transmission fluid every year and replace it with new (I know it’s only half the fluid) and I put a new filter in every three. I put in a steering stabilizer on yesterday it took an hour because Ford messed up the threads on the spring U bolt my impact couldn’t remove the one so I took it off with a breaker bar, used a die and cleaned the threads and installed it. I’m only 70 so I try to do all the work myself if I can. Transmission and regular oil changes are easy because you don’t need to jack them up. Walmart will take the oil for free.
Changing the fluid that is in the pan is easy but most of the old fluid is left in the torque converter. So essentially your only changing 1/4 of the fluid. On my DP Allison says Quote “there is no way to drain the converter. Just add new fluid, drive a few thousand miles drain and fill again. Eventually you will have all new fluid” end quote.
I like my mornings when I get to sleep right through ’em!